Mains

Overnight Oats with Berries, Flax and Walnuts

If you’re looking for a quick, healthy and delicious breakfast option, these overnight oats are perfect.

The most difficult part is remembering to soak the oats overnight. You just need equal amounts of raw whole oats and nut or soy milk. Pour the milk over the oats, stir and refrigerate.

The next morning, take the oats out of the refrigerator. You will see that they absorbed most of the milk and are soft and ready to eat. Gather your toppings: fruit, raw nuts, ground golden flaxseed, granulated Stevia sweetener, cinnamon and nutmeg.

Microwave the frozen berries (or other fruit of your choice) until thawed. It only takes about a minute. Then spoon the fruit over the oats. I like to use blueberries and strawberries, but here I found a blend that also includes tart and sweet cherries.

Next, sprinkle the flaxseed, nuts, spices and sweetener (optional). It’s ready to enjoy! This meal is full of fiber, antioxidants and a bit of healthy fat.

Overnight Oats with Berries, Flax and Walnuts

Servings:  1

  • 1/2 cup rolled oats, organic/non GMO
  • 1/2 cup unsweetened nut or soy milk (such as Almond Breeze Vanilla Almond Cashew Milk)
  • 1 cup frozen mixed berries, thawed
  • 1 tablespoon raw walnuts, chopped
  • 1 tablespoon ground golden flaxseed
  • 1/2 teaspoon granulated Stevia sweetener, such as Truvia
  • 1/4 teaspoon ground cinnamon
  • 1/4 teaspoon ground nutmeg

Directions:

Pour the oats into a bowl and cover with the nut or soy milk.  Cover and place in the refrigerator overnight.

In the morning, place some frozen fruit into a bowl and microwave for 1 minute, or until thawed.  Pour the fruit over the oats.  Add chopped nuts, flaxseed, sweetener and spices and stir to combine.

Pressure Cooker (Instant Pot) Chili with Turkey and Vegetables

I’m continuing my plan to add as many vegetables as possible to the recipes that I prepare. Chili is something that’s quick and easy to throw together, and can be frozen for later, so I tend to make it pretty often. I also like to try using different ingredients and seasonings, depending what I have on hand and what I’m in the mood for.

Everyone has their own favorite chili recipe, and they vary depending where you live. From Texas to Cincinnati to New York, some people use chunks of meat vs. ground, beans vs. no beans, vegetarian vs. all meat, beer or no beer, super spicy or mild, there are endless variations.

This is why I’m posting a second chili recipe. I decided to pack in even more vegetables and decrease the meat, to make it even healthier!

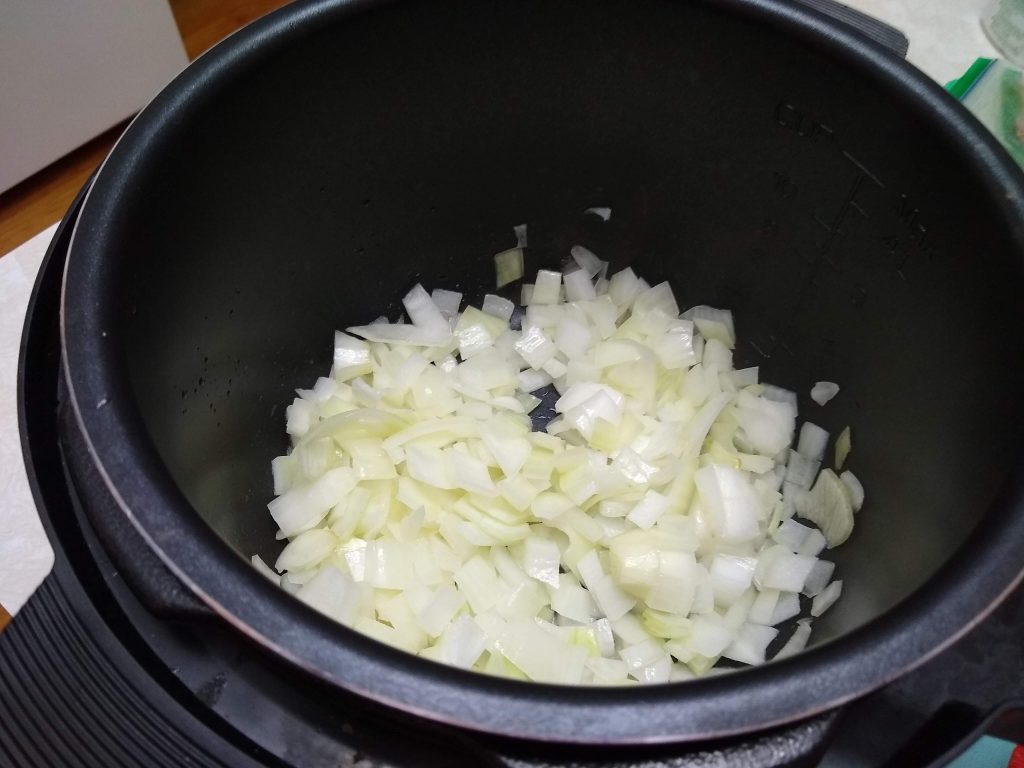
I really like using my pressure cooker for recipes like this, but you can easily make it on the stove, as well. Start by turning on the saute function, adding a bit of oil and saute the the onions for a minute or two.

Then add 1 pound of ground turkey, and break it up while continuing to saute.

Meanwhile, chop some vegetables: carrots, celery, and bell peppers.

Add them to the pot along with some finely chopped mushrooms and garlic.

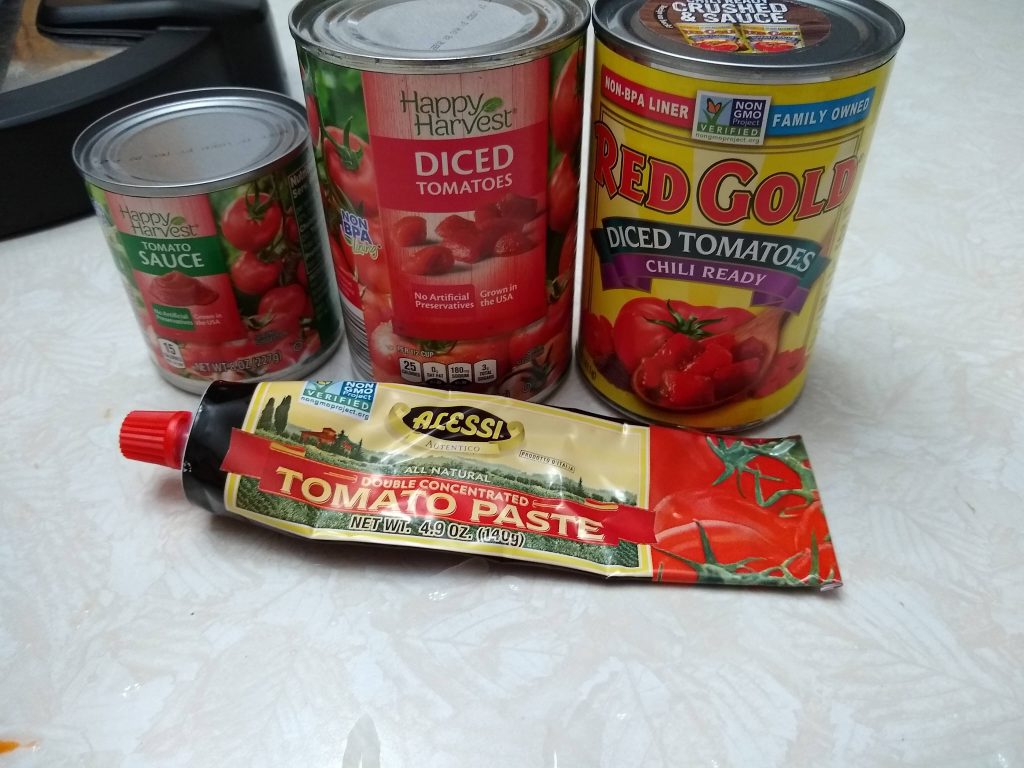
Then add canned tomatoes, plain diced, chili-ready and tomato sauce, as well as some tomato paste.

Also add 2 cups of vegetable or chicken broth, and spices like chili powder, cumin, salt, pepper, chipotle chili and a bit of sweetener.

Close the lid and seal it, and choose manual cooking for 10 minutes. When the timer goes off, let the chili remain on warm for at least 30 minutes before serving.

My husband doesn’t care for beans, but he does like a bit of macaroni in his chili. So feel free to offer a variety of options so your family or guests can have it the way they prefer (beans, macaroni, avocado, cheese, sour cream, jalapenos or hot sauce). I added some organic black beans to my bowl.

It’s delicious, satisfying, slightly spicy, and sure to warm you up on a cold day. Try making some today!

Pressure Cooker (Instant Pot) Chili with Turkey and Vegetables

Servings:  8

  • 1 tablespoon olive oil
  • 1 pound ground turkey, preferably organic
  • 1 onion, peeled and diced
  • 8 ounces white mushrooms, minced
  • 2 carrots, diced
  • 2 stalks of celery, diced
  • 2-3 medium bell peppers, assorted colors
  • 3 cloves of garlic, minced
  • 1 15-ounce can diced tomatoes
  • 1 15-ounce can chili-ready tomatoes
  • 1 8-ounce can tomato sauce
  • 2 cups chicken or vegetable broth
  • 1 chipotle chili in adobo, finely chopped
  • 2 tablespoons ground chili powder
  • 2 tablespoons ground cumin
  • 1 tablespoon tomato paste
  • 1 teaspoon salt
  • 1/2 teaspoon black pepper
  • 2 teaspoons granulated sweetener made from stevia

Directions:

In an Instant Pot pressure cooker, turn on the saute function, add the oil and the onions, and cook for a minute or two. Then add the ground turkey and brown the meat, breaking it into small chunks.

Add the mushrooms, carrots, celery and peppers, and continue cooking until softened.  Add the garlic and cook for another minute.  Turn off the saute function.

Add the tomatoes, broth and seasonings and stir.  Seal the lid and set the Manual setting for 10 minutes.

When the timer goes off, leave the sauce on warm for at least 30 minutes before releasing the pressure.

Note:  If you don’t have an Instant Pot, you can make the sauce on the stove in a large soup kettle.  Follow the directions as above, and simmer the mixture for 1 hour before serving.

Healthy Turkey Meatballs (Gluten-Free)

I love meatballs, but wanted to create a moist, delicious and healthy version that had equal amounts of meat and vegetables, and that didn’t require flour or breadcrumbs.

These Healthy Turkey Meatballs are exactly what I was hoping for. The best thing about them is that you can serve them in many different ways. You can make them smaller or larger, serve them plain or with your favorite marinara sauce. Or you can serve them with a dipping sauce…barbecue, ketchup, spicy mustard, creamy dressing, or perhaps tzaziki.

Start by sauteeing some finely chopped onions, mushrooms and garlic, then set the mixture aside to cool.

Take a package of frozen chopped spinach, thaw it and squeeze all the liquid out. Then use 2 pounds of ground turkey (in this case, I used 93% lean), and add salt, pepper, fresh rosemary and a dash of cayenne.

Mix everything together and form 2-inch meatballs, then place them on a parchment lined baking sheet. I ended up with 28, but you can make them smaller or larger if you prefer.

Bake them for 30 minutes at 400 degrees, turning them after 15 minutes.

These meatballs are great as a meal, or a snack. You can also freeze them to use later. Enjoy!

Healthy Turkey Meatballs (Gluten-Free)

Servings:  8 entree/16 appetizer  (Makes about 30 two-inch meatballs)

  • 1 tablespoon avocado oil (or olive oil)
  • 1 medium yellow onion, peeled and diced
  • 8 ounces fresh mushrooms, minced
  • 3 cloves garlic, minced
  • 2 pounds ground turkey, preferably organic
  • 1 9-ounce package frozen chopped spinach, thawed and squeezed dry
  • 1 tablespoon fresh rosemary leaves, minced
  • 1 3/4 teaspoon salt, divided
  • 1 teaspoon black pepper
  • 1/4 teaspoon cayenne pepper

Directions:

In a large skillet, heat the oil over medium heat.  Add the onions, mushrooms and 1/4 teaspoon salt and saute for several minutes, until tender.  Add the garlic and cook for another minute.  Place the mixture in a large bowl and set aside to cool.

Once the vegetables are cool, add the turkey, spinach, rosemary, 1 1/2 teaspoons salt, pepper and cayenne and mix thoroughly.  Form into 2-inch meatballs and place on a parchment lined baking sheet.  You should have approximately 28-30 meatballs. 

Place in a preheated 400 degree oven and bake for 30 minutes, turning the meatballs after 15 minutes.

The meatballs are very versatile and can be served plain, or with your favorite sauces, dips or dressings:  marinara, barbecue, ketchup, mustard, or ranch dressing.

Shrimp Tacos with Lime-Cilantro Crema

I make this recipe quite often, using either shrimp or fish. It’s a great option when you’re short on time because it comes together so quickly. The most time-consuming part is peeling the shrimp! I adapted the recipe from one for fish tacos posted in 2006 by Cooking Light.

Start by making the Lime-Cilantro Crema. Just stir together equal amounts of mayonnaise and sour cream, a bit of fresh lime juice, garlic, salt, along with chopped cilantro and scallions.

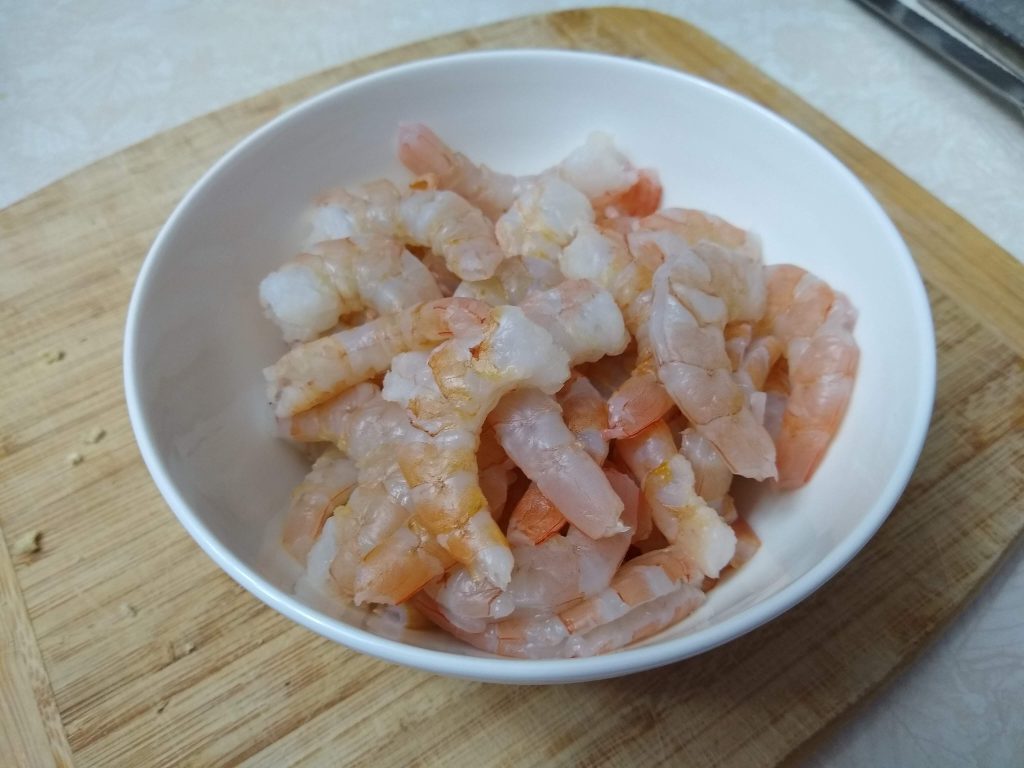
Then, peel and devein one pound of shrimp. Note that you can use any firm fish in place of the shrimp. I prefer this recipe because it doesn’t require breading and deep frying the fish or shrimp, so it’s much healthier.

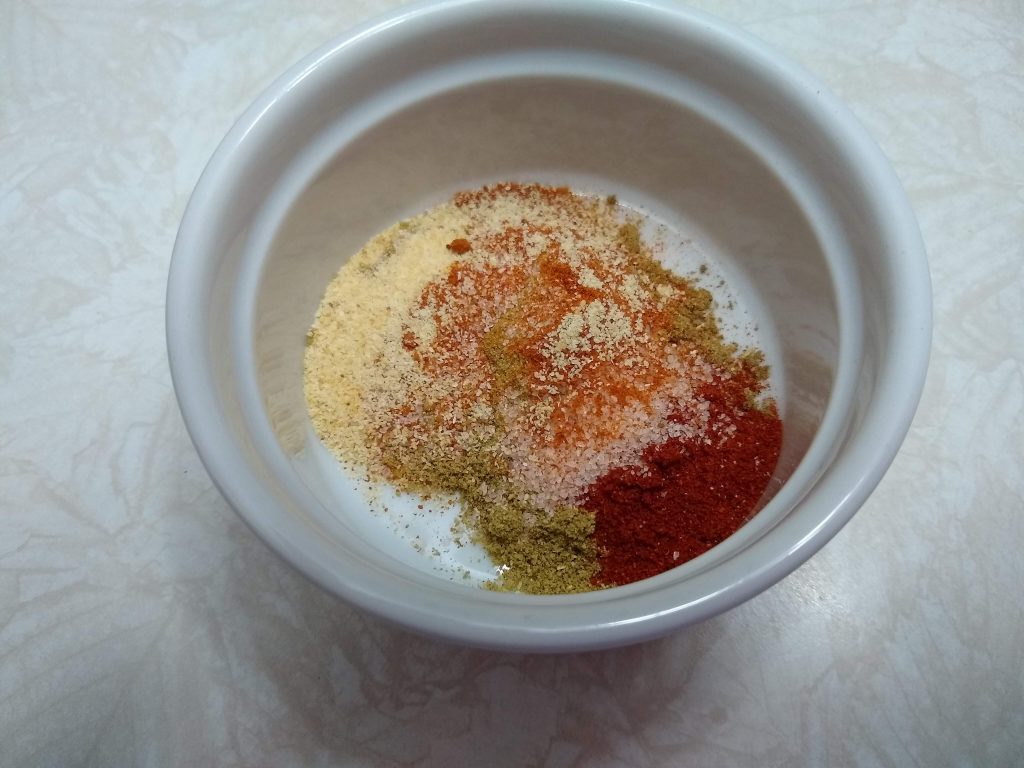
Next, toss with some oil and the spices: cumin, coriander, smoked paprika, cayenne pepper, granulated garlic and salt.

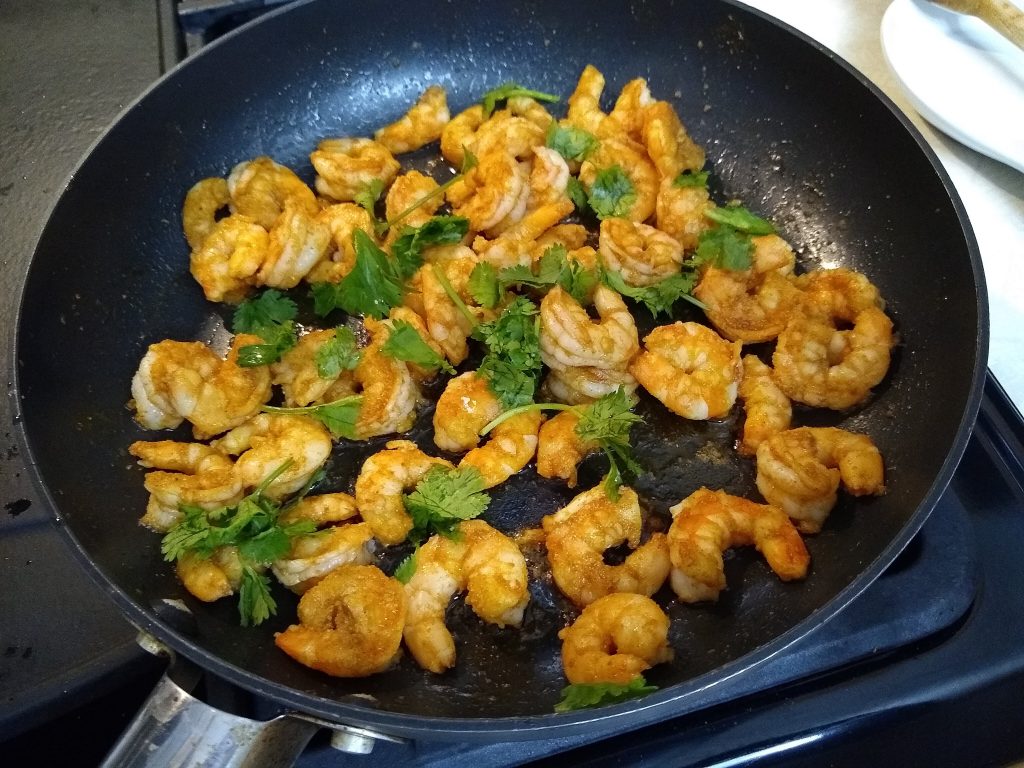
Heat a skillet and cook the shrimp over medium-high heat. They only take a few minutes to cook.

You can serve the shrimp in the traditional way, on corn or flour tortillas with some crema and cabbage. (My husband prefers flour tortillas.) Or you can have them the way I did, over mixed greens with a drizzle of crema. Believe me, the salad was rich and satisfying, with the cool greens and warm, spicy shrimp, paired with the tangy sauce. I added a few slices of avocado, too, so I really didn’t miss having any tortillas. Squeeze a bit more fresh lime juice over the top before serving.

Try it and let me know what you think.

Shrimp Tacos with Lime-Cilantro Crema

Servings:  2-3

Crema

  • 1/4 cup finely sliced green onions
  • 1/4 cup finely chopped cilantro
  • 3 tablespoons mayonnaise
  • 3 tablespoons sour cream
  • 1 clove garlic, minced
  • 1 1/2 teaspoons fresh lime juice
  • 1/4 teaspoon salt

Tacos

  • 1 pound raw shrimp, peeled and deveined
  • 1 tablespoon avocado oil
  • 1 teaspoon ground cumin
  • 1 teaspoon ground coriander
  • 1/2 teaspoon smoked paprika
  • 1/4 teaspoon salt
  • 1/4 teaspoon granulated garlic
  • 1/4 teaspoon cayenne pepper
  • Corn or flour tortillas, optional
  • Shredded cabbage
  • Lettuce leaves or mixed greens

Directions:

Place the crema ingredients in a small bowl and stir to combine.
Place the shrimp in a medium bowl, add the oil and spices and toss to evenly coat the shrimp with the spices.

Heat a frying pan over medium-high and add the shrimp.  Stir frequently for 2-3 minutes until the shrimp is cooked.  Remove from the heat.

Serve the shrimp with some crema and shredded cabbage on tortillas, wrapped in lettuce leaves or over mixed greens. 

Instant Pot Stuffed Cabbage Rolls (Galumpki) Casserole

Galumpki is the Polish name of a dish popular in cuisines of Central Europe, made from boiled cabbage leaves wrapped around a filling of minced pork or beef, chopped onions, and rice or barley.

I have enjoyed cabbage rolls at many family gatherings.  Not quite as popular as pierogi and paczki, they are still delicious, but time consuming to prepare.  I decided to experiment with my new pressure cooker, and make a casserole that had the flavors of stuffed cabbage without all the work.

I apologize for the lack of pictures showing the preparation, but I hadn’t decided if I would include this recipe on my blog, in case it was a disaster.  Once we tasted it and determined that it was good, I took a photo and decided to share it with everyone.

I used ground turkey instead of beef or pork, along with some onion, cabbage and canned tomatoes.  In many recipes I substitute riced cauliflower for regular rice, but this time I decided to use rice to make it a bit more traditional.  With all of the vegetables, meat, and only one cup of rice, the portion of rice is very small. But you can feel free to use riced cauliflower if you prefer.

It takes a bit of time to chop the cabbage, and saute the meat and vegetables, but the cook time is only 15 minutes, (plus the time to bring the mixture up to pressure).  It will be finished before you can even boil cabbage leaves to make it the old fashioned way!

My husband really enjoyed this dish, much more so than regular cabbage rolls.  Try it!

Instant Pot Stuffed Cabbage Rolls (Galumpki) Casserole

Servings:  6-8

  • 1 tablespoon avocado oil (or olive oil)
  • 1 pound ground turkey, preferably organic
  • 1 medium yellow onion, peeled and diced
  • 1/2 large head of green cabbage, chopped
  • 1 cup basmati rice
  • 1 (14.5 ounce) can crushed tomatoes
  • 2 cups low sodium chicken broth
  • 1 tablespoon tomato paste
  • 1 tablespoon stevia brown sugar blend, such as Truvia
  • 1 tablespoon fresh dill weed, minced
  • 1 teaspoon paprika
  • 1 teaspoon sea salt, or to taste
  • 1/2 teaspoon black pepper
  • 1/2 cup scallions, finely chopped

Directions:

Turn on the saute function of the Instant Pot.  Add the oil and the ground turkey, and cook for a few minutes until slightly browned, breaking up the meat into small pieces.

Add the onions and cabbage, and cook for a few more minutes until softened.

Add the remaining ingredients, except scallions, and stir to combine.

Turn off the saute setting, close the lid and lock into place, being sure that the valve is in the sealed position.  Press the button for Manual, and adjust the cook time to 5 minutes, then press Start.

When the time is up, let the pressure release naturally for 10 minutes before venting the steam.   Stir, and taste to adjust seasonings.  If the mixture is too thick, add more broth.

Sprinkle with the scallions and serve.

Variation:  To make the recipe lower in carbs, substitute riced cauliflower for the basmati rice, and decrease the chicken broth to 1 cup.

Spanakorizo with Riced Cauliflower and Chicken Sausage

This is a classic Greek dish made with spinach and rice that I transformed into a low carb, healthy and delicious meal! I added organic chicken sausage to make it a complete meal instead of a side dish, but you can omit the sausage if you prefer to keep it vegetarian.

You can swap the regular rice for cauliflower rice in almost any recipe, and still have a filling, satisfying feast. Your family or guests probably won’t be able to tell the difference!

This recipe is quick and easy, (under 30 minutes), perfect for a weeknight. You just need a few ingredients like spinach, riced cauliflower, chicken sausage, lemon and feta cheese.

I started by sauteing some diced onion in olive oil and butter.

Once the onion is nice and soft, add the frozen riced cauliflower. No need to thaw it first.

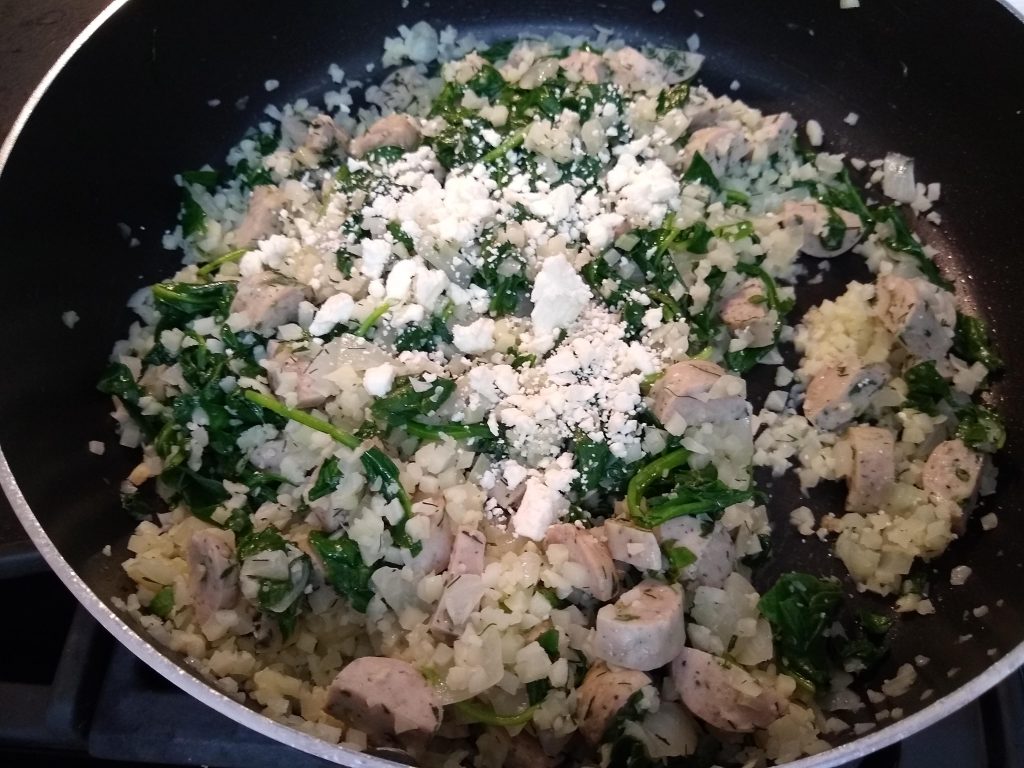
Stir it around so it thaws and releases some of its moisture. Once it’s heated through, throw it the diced chicken sausage. I used one that had spinach and garlic, but you can use any kind of sausage you like. Just be sure it’s precooked so it just needs to be heated.

After adding the sausage, cover the pan and cook for 5 minutes, to finish cooking the riced cauliflower. Add salt and pepper, then throw in the fresh spinach.

Cover the pan again, just for a minute or two, to allow the spinach to wilt. Then give it a stir, take the pan off the heat, and add fresh dill weed, fresh lemon juice and a sprinkle of feta cheese (optional). Taste to adjust seasonings.

It’s a delicious combination: buttery rice, hearty sausage with a hint of garlic, fresh spinach, classic Greek flavors of dill, tart lemon and salty feta.

Spanakorizo with Riced Cauliflower and Chicken Sausage

Servings:  3-4

  • 1 tablespoon olive oil
  • 1 tablespoon organic butter
  • 1 medium onion, diced
  • 1 12-ounce bag frozen riced cauliflower
  • 3 fully cooked organic chicken-spinach sausages, from a 12-ounce package
  • 1/2 teaspoon sea salt
  • 1/4 teaspoon black pepper
  • 5 ounces fresh organic baby spinach leaves
  • 1 tablespoon fresh dill weed
  • Juice from 1/2 lemon
  • 2 tablespoons crumbled feta cheese, optional

Directions:

Heat a large skillet over medium heat and add the olive oil, butter and chopped onion.  Saute for several minutes, until soft.

Add the frozen riced cauliflower and stir to break up any large clumps.  As it heats, the moisture will start to evaporate.  Saute for a few minutes, then add diced chicken sausage.  Cover and cook over medium-low heat for 5 minutes.

Add the salt and pepper, then the baby spinach leaves.  Cover pan to wilt the spinach for 1-2 minutes.

Remove cover and stir to be sure spinach is evenly cooked.  Turn off the heat and add the dill, lemon juice and feta cheese, if desired.  Stir again and taste and adjust seasonings.

Serve with an additional squeeze of lemon or a sprinkle of feta cheese.

Grilled Boneless Chicken Thighs

I love to grill in the summer. This recipe is perfect to serve when entertaining friends or family, or just an easy meal for any night of the week. You can double the amount and have leftovers to use in many different ways.

In order to get the most flavor, it helps to marinate the chicken for at least an hour. But if you can’t wait that long, even 15 minutes would still give you a delicious result.

Start by putting the boneless, skinless chicken thighs in a large food storage bag.

Then gather your marinade ingredients: juice from 1 medium lemon, extra virgin olive oil, salt, pepper, oregano and thyme.

Mix the marinade ingredients together and pour them into the bag. Seal it, being sure to press all the air out, and smoosh the bag so the marinade coats the chicken evenly.

Place the bag in the refrigerator, preferably for at least an hour.

Preheat a barbecue grill, then place the chicken thighs on the hot grates. At this point I lower the temperature so it doesn’t burn and cause flare-ups.

Turn the chicken after 4-5 minutes. Cook on the other side for a few minutes, then turn again to finish and reach 165 degrees F. It usually takes about 12-15 minutes, depending on the size of the thighs. I like using chicken thighs as opposed to breasts, not only for the richer flavor, but they hold up better and there’s less chance of overcooking them.

Take the chicken off the grill and slice it into bite-sized chunks. The meat is tender, juicy and slightly charred, with the delicious flavors of lemon, oregano and thyme.

On Mondays, I like to serve a big salad for dinner, with some type of protein. This chicken is the perfect thing to have with some mixed greens and ranch dressing.

Just add a bit of salt and pepper to your greens, your favorite homemade or store-bought dressing, toss well, then serve the sliced chicken on top of the salad. Easy, healthy dinner!

Grilled Boneless Chicken Thighs

Servings:  3-4

  • 1.3 pounds organic boneless, skinless chicken thighs
  • Juice from 1 lemon
  • 1/4 cup extra virgin olive oil
  • 1 teaspoon sea salt
  • 1 teaspoon dried oregano
  • 1/2 teaspoon black pepper
  • 1/2 teaspoon dried thyme
  • Organic Mixed Greens
  • Salt and pepper to taste
  • Ranch Dressing

Directions:

Place the chicken thighs in a large plastic food storage bag.  Mix the lemon juice, oil and spices and pour over the chicken.  Seal the bag and gently squeeze the chicken pieces to distribute the marinade evenly.  Refrigerate for one hour.

Light a barbecue grill and preheat on high for 5-10 minutes.  Remove the chicken from the bag and place on the hot grill.  Lower the temperature to medium.  Grill with the lid closed for 12-15 minutes, turning a few times, until the chicken is thoroughly cooked (165 degrees Fahrenheit).  Remove to a cutting board and slice into bite-sized pieces.

Season the mixed greens with salt and pepper.  Add ranch dressing and toss.  Serve the chicken on top of the salad.

Chicken Italian Sausage with Peppers and Onions

This is a quick and easy meal, perfect for a weeknight! Since the sausage is precooked, it only takes a few minutes to prepare.

You just need a package of prepared chicken sausage, some chopped onions, a jar of roasted red peppers, garlic, tomato paste, and a few spices. For this version, I used Nitrate-Free Tomato and Basil Chicken Sausage from Aldi, but you can use any Italian-style sausage that you prefer.

Of all the ingredients, the onion takes the longest to cook, so you get that cooking in a big skillet with some oil until it’s slightly browned and tender. Then add the peppers, garlic and spices.

After a couple of minutes, add the tomato paste and wine. Reduce slightly, then add the sausage. As soon as it’s heated through, it’s ready to serve!

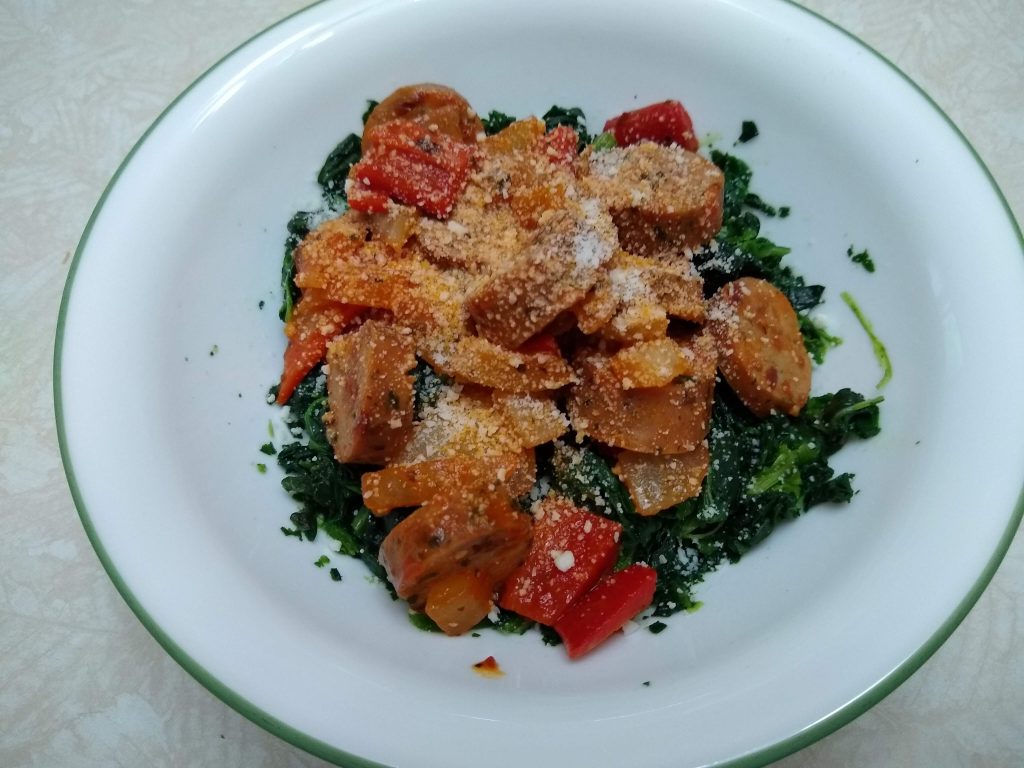
You can serve it along with pasta or rice, but for myself, I prepared some spinach with olive oil and salt.
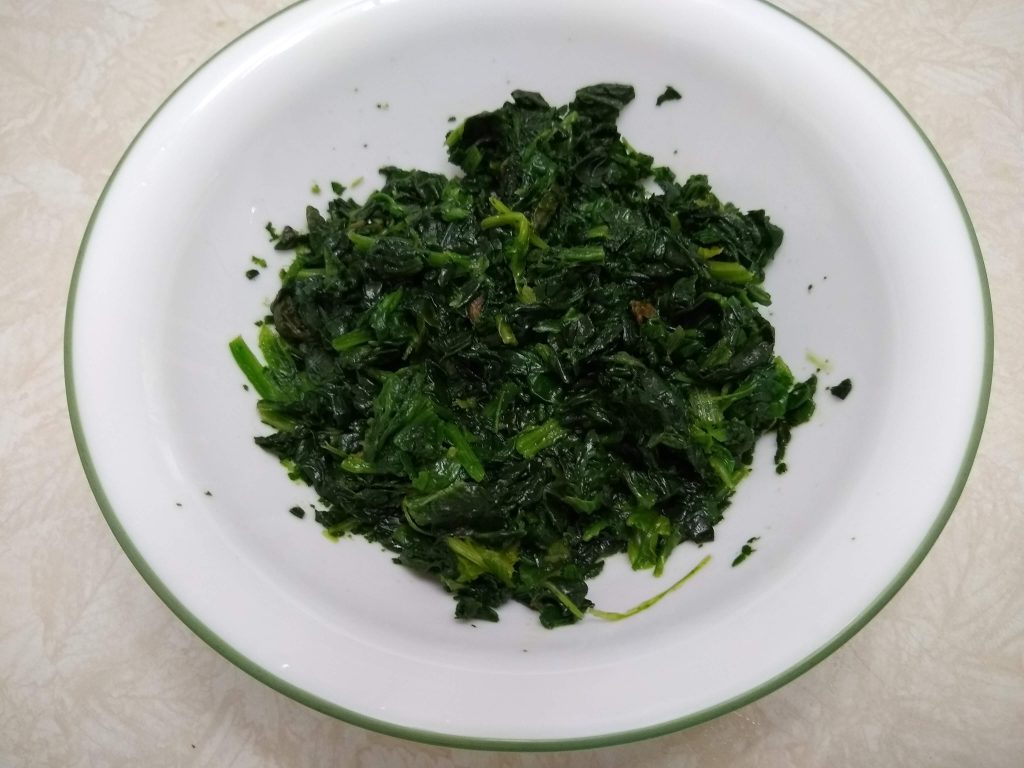
I had a couple of spoonfuls of the sausage mixture on top of the spinach, sprinkled with a bit of parmesan cheese, and it was a delicious, satisfying meal.

Chicken Italian Sausage with Peppers and Onions

Servings:  4

  • 2 tablespoons avocado oil (or light olive oil)
  • 1 cup diced yellow onion
  • 1 cup diced roasted red peppers (from a jar)
  • 2 cloves garlic, minced
  • 1/2 teaspoon dried oregano
  • 1/2 teaspoon dried basil
  • 1/4 teaspoon sea salt
  • 1/4 teaspoon red pepper flakes
  • 2 tablespoons tomato paste
  • 1/2 cup dry white wine
  • 12 ounces prepared nitrate-free tomato and basil chicken sausage(or any Italian-style sausage), sliced

Directions:

Heat a large skillet over medium heat, add the oil, then the chopped onion.  Saute for 5-10 minutes, until slightly browned and tender.

Add the red peppers, garlic and spices and continue cooking for 2 minutes.  Add the tomato paste and wine, and cook for another 2 minutes.  Add the sliced sausage and cook until heated through.

Variations:  Add sliced mushrooms in the first step when cooking the onions.  Add fresh spinach along with the sausage and cook just until wilted.

Red Curry Cauliflower with Crispy Tofu

This recipe has a few steps to it, and takes a little longer to prepare, but it’s worth it!

The main ingredients are tofu, a slightly sweet, tart and spicy sauce made from red curry paste and lime, and cauliflower.

I adapted this recipe from the book: “Myers & Chang at Home.” The author, Joanne Chang, is well known for founding a chain of restaurants in Boston called Flour Bakery & Cafe. I sampled amazing food there when I visited Boston a few years ago. Later, she opened Myers & Chang with her husband.

I like to take tips and techniques from many different sources and adapt them for my recipes. For example, if a recipe uses sugar, I usually substitute stevia. If it includes pasta or rice, I substitute vegetables or salad. I may cut back on the amount of salt or oil used.

For this recipe, I used a technique to press and bake tofu to give it a chewy, crispy consistency. I have read about this in more than one place, but here I used advice from MinimalistBaker.com, from their recipe: Crispy Peanut Tofu and Cauliflower Rice Stir-Fry.

You start by opening a package of extra-firm tofu and placing it on a clean kitchen towel.

Then you wrap the towel around the tofu several times until it’s completely covered.

Then you put a weight on top of it to press out all the water. This will give it a denser, chewier consistency when cooked. You can use any heavy items you have around the house. In this case, I used a cutting board, a trivet and a tea kettle filled with water.

After 15 minutes, slice the block of tofu in half lengthwise, then into small cubes. Place them on a parchment paper lined tray.

Bake the tofu at 400 degrees for 25 minutes. It comes out slightly crispy, dense and chewy.

The first time I had crispy tofu like this was in a restaurant, and I really enjoyed it. But most likely, that was deep fried. This version is much healthier since it’s baked. It’s so different from regular tofu that might be used in soups or lightly sauteed where it’s still mushy and without flavor. This tofu holds up to any stir-fry and sauce that you choose to prepare.

While the tofu is baking, make the Red Curry Sauce. It’s very simple…you just add a bit of oil, prepared red curry paste, coconut milk, sugar, curry powder, salt and lime. The recipe called for 2 tablespoons of brown sugar, but instead I used 1 tablespoon of Truvia Cane Sugar Blend, made with a blend of stevia and sugar. It’s twice as sweet as sugar, so you use half as much, and you end up with only a very small amount of sugar in each serving.

You squeeze in the lime juice and then throw the rinds into the sauce to simmer for 10 minutes, giving it that extra tart flavor.

Once the sauce is ready, set it aside and chop some onion, cauliflower and cilantro.

The original recipe calls for blanching the cauliflower in boiling water for 2 minutes. But to save time and avoid washing another pot, I just microwaved it on high for 3 minutes.

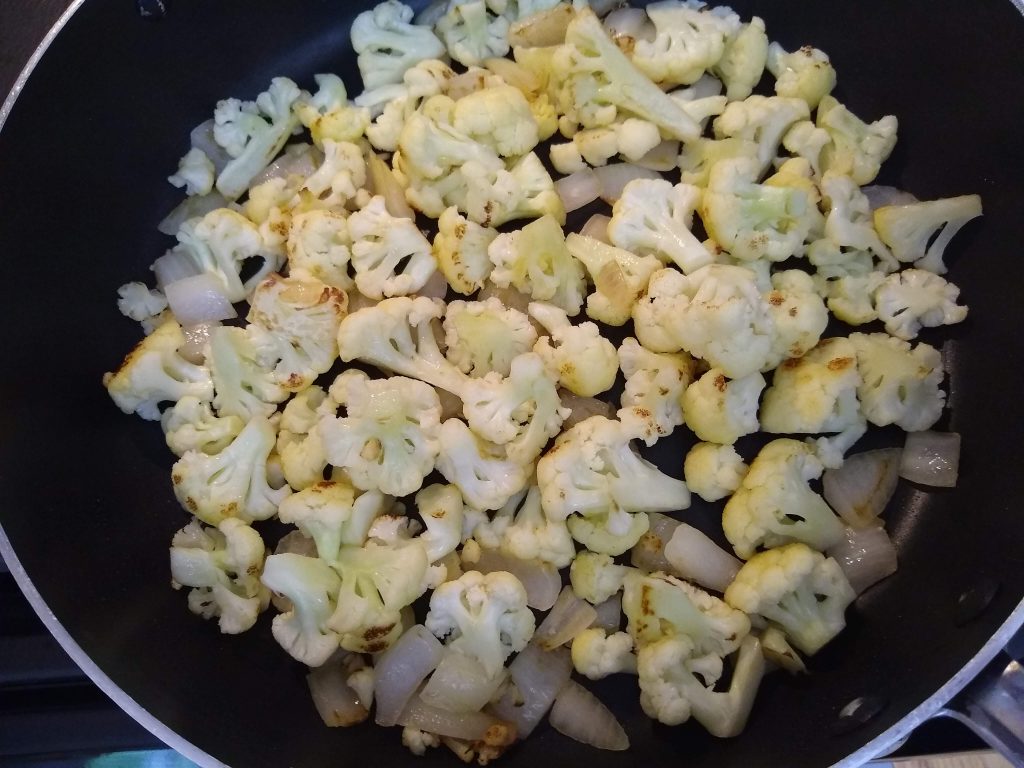
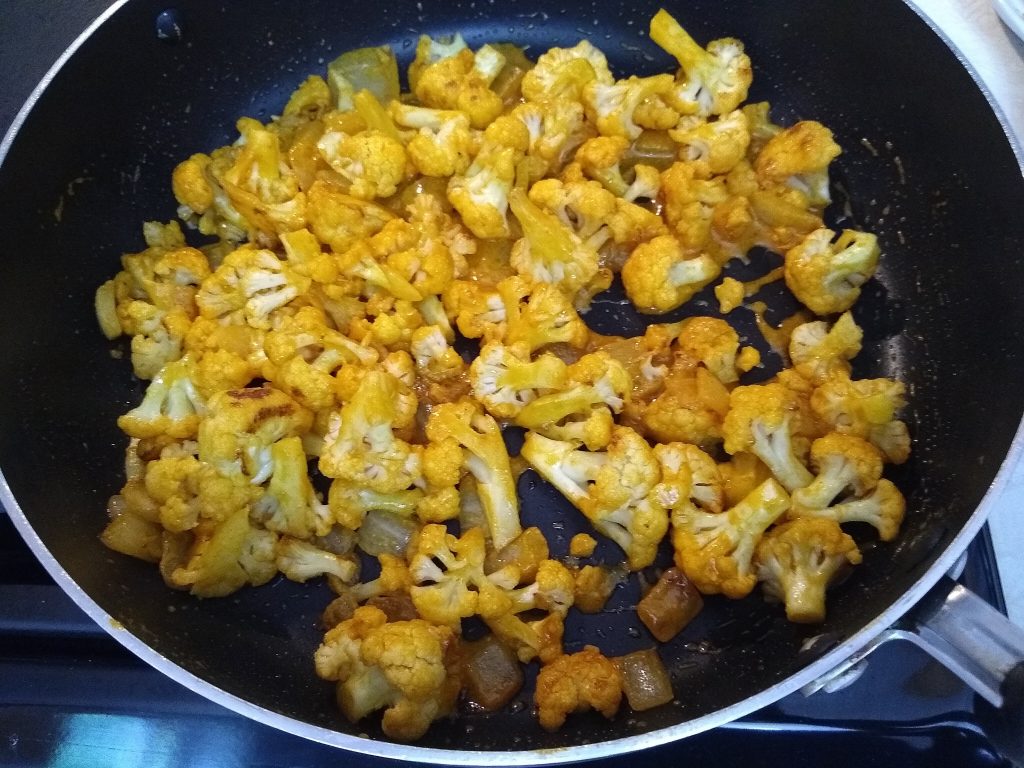
Then, get a large skillet nice and hot, add some vegetable oil, and throw in the onions and cauliflower and a bit of salt. Cook for 6-8 minutes, stirring now and then, until the vegetables are slightly browned.

Then add half of the red curry sauce. The original recipe uses the full amount of sauce, as well as more salt and more oil, but I don’t think it’s necessary. (And the great thing is that you’ll have enough sauce left over to make another recipe in the future.)

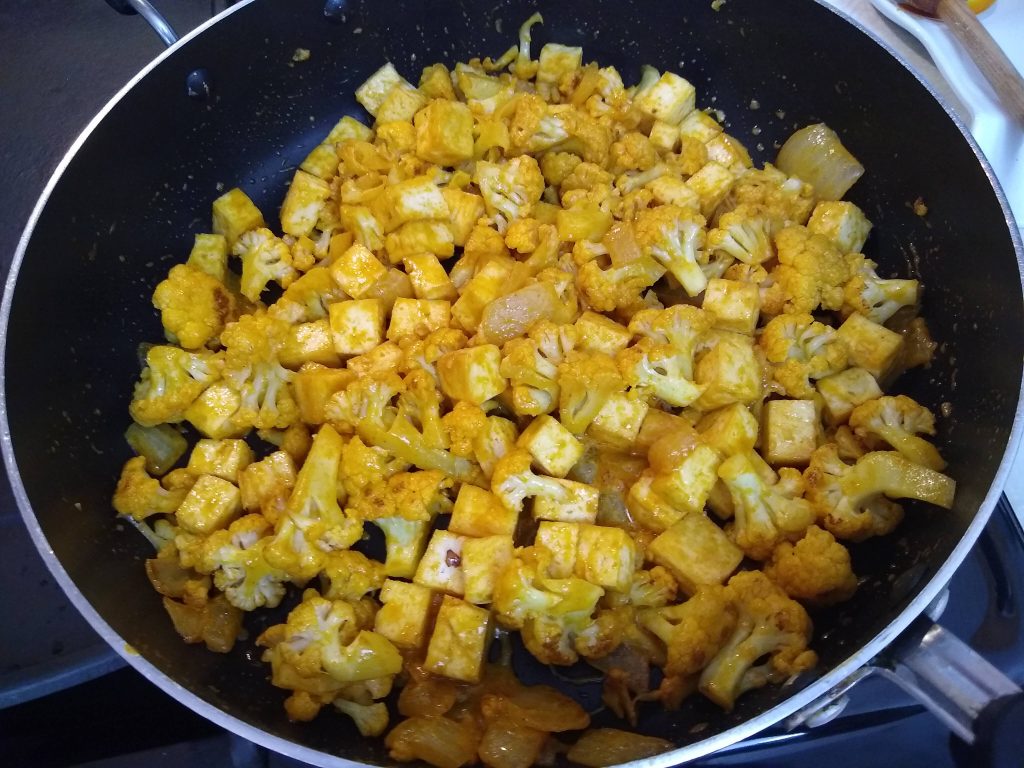
After simmering the cauliflower and onion for 5 minutes, add the crispy baked tofu.

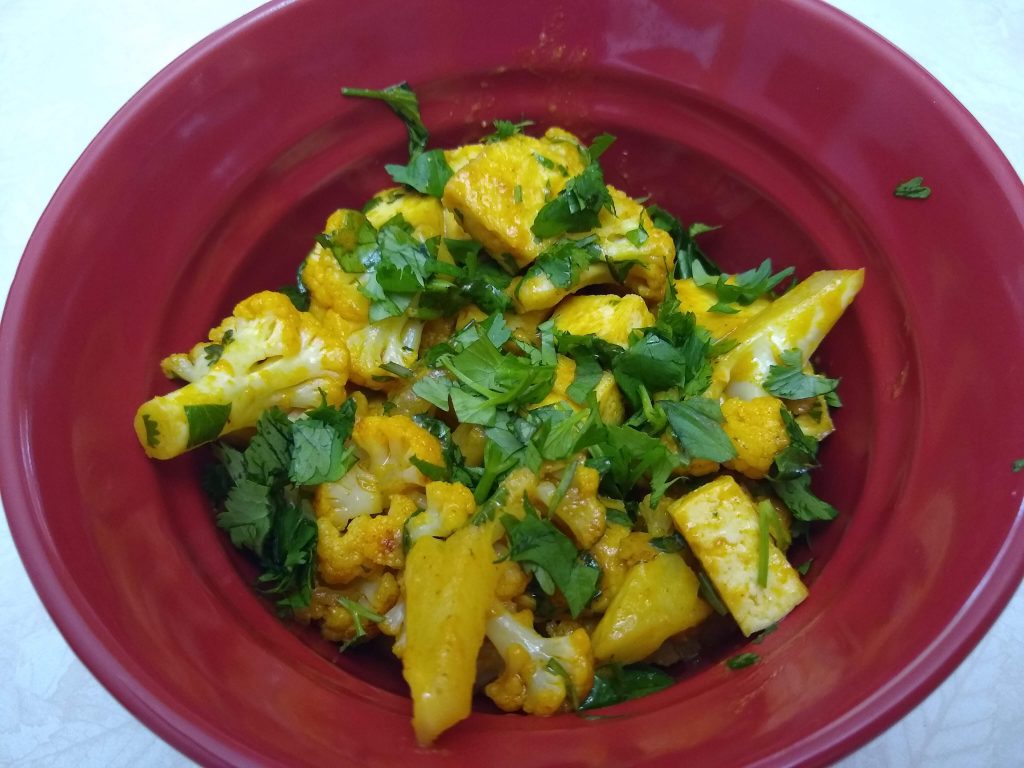
Simmer for another 2 minutes to allow the tofu to absorb the flavors. Then add the cilantro and serve.

It’s such a delicious combination, slightly charred cauliflower, dense and chewy tofu, with a spicy, sweet, salty and tart sauce.

Red Curry Cauliflower with Crispy Tofu

Servings:  4

1 (16-ounce) block of extra-firm organic tofu

Red Curry Sauce

  • 2 tablespoons avocado oil (or light olive oil)
  • 1/4 cup red curry paste (such as Roland)
  • 1/2 cup coconut milk (from a can)
  • 1 tablespoon curry powder
  • 1 tablespoon stevia baking blend (such as Truvia)
  • 2 teaspoons sea salt
  • 1 lime, quartered

Stir-Fry

  • 2 tablespoons avocado oil
  • 1 medium head cauliflower
  • 1/2 cup chopped yellow onion
  • 1/4 teaspoon sea salt
  • 6 tablespoons Red Curry Sauce (half the recipe)
  • Crispy baked tofu
  • 1/2 cup chopped cilantro

Directions:

Preheat the oven to 400 degrees.

Remove the tofu from the package and place in a clean kitchen towel.  Fold the towel several times over to fit the shape of the tofu.  Place a heavy cutting board, plus a cast iron skillet, books, or a tea kettle filled with water on top of the tofu to press out the water. 

After 15 minutes, slice the block of tofu in half lengthwise, then cut into cubes, approximately 1 inch thick.  Place them on a sheet pan covered with parchment paper and bake for 25 minutes, stirring halfway through.  Remove from the oven and set aside.

While the tofu is baking, make the Red Curry Sauce.  Heat 2 tablespoons oil along with the curry paste in a small saucepan.  Stir and simmer for 2 minutes over low heat until fragrant.  Add the coconut milk, curry powder, stevia and salt.  Squeeze the juice from the lime and add the 4 lime rinds to the sauce.  Simmer for 10 minutes, stirring frequently with a whisk.  Turn off the heat and set aside.

Cut the cauliflower in fourths, then cut off each stem at the base to remove the leaves.  Cut into small florets and place in a large bowl.  Cover and microwave on High for 3 minutes.

Heat a large skillet over medium-high heat, add the oil, then toss in the chopped onion, cauliflower and salt.  Stir-fry for 6-8 minutes until slightly charred.  Add half the amount of Red Curry Sauce that you prepared, approximately 6 tablespoons.  The remainder can be frozen and used another time.  Lower the heat and simmer for 5 minutes.  Add the crispy tofu cubes and simmer for another 2 minutes.  Remove from the heat and sprinkle with chopped cilantro.

Cheesy Crustless Spinach Quiche

I like to make quiche at the beginning of the week, then I don’t have to worry about cooking for several days. It’s a great way to use up leftovers. I had a large bunch of spinach that I wanted to use, as well as some feta cheese, so this was the perfect recipe.

It also freezes well, so you can just cut it in slices and freeze, then microwave for a minute or two and it’s ready to eat.

In this version, I decided to add a combination of cheeses along with the spinach, plus oregano and fresh dill, so it ended up tasting a bit like Spanakopita, a delicious Greek dish made from spinach and feta.

Since I’m cutting back on carbs, I like to make quiches without crust. Not to mention, it’s so much easier! You won’t even miss the crust.

As with omelets, there are endless combinations of ingredients you can use: bacon, sausage, ham, mushrooms, broccoli, peppers, onions, swiss, provolone or cheddar. It’s best to keep it simple, with one type of meat (optional), one or two vegetables and some type of cheese.

In today’s recipe, I started by sauteing a big bunch of spinach.

Once it wilted, I added garlic and a pinch of salt, then I squeezed out as much liquid as possible, so the quiche wouldn’t be watery. I spread out the cooked spinach in the bottom of my quiche dish.

Next, I took a quarter cup of crumbled feta cheese and 1 cup of shredded Italian Cheese blend.

I sprinkled the cheeses evenly over the top of the spinach.

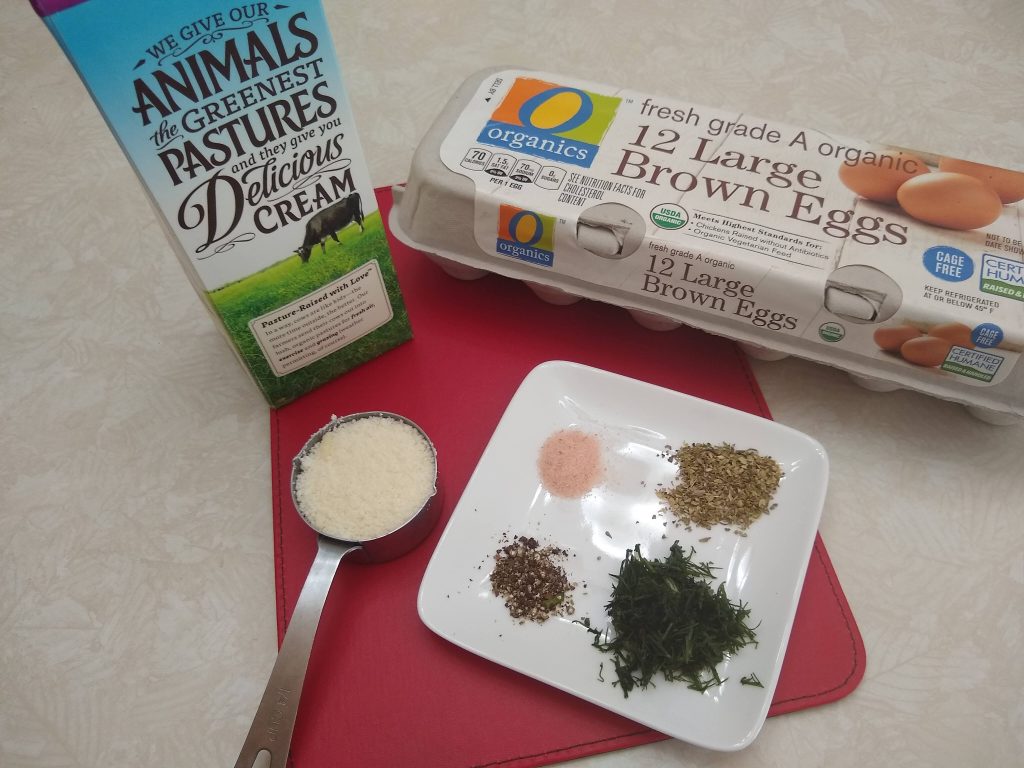
Then I gathered the ingredients for the egg mixture: organic eggs, half and half, salt, pepper, oregano and dill. I also have a quarter cup of grated Parmesan to sprinkle on top.

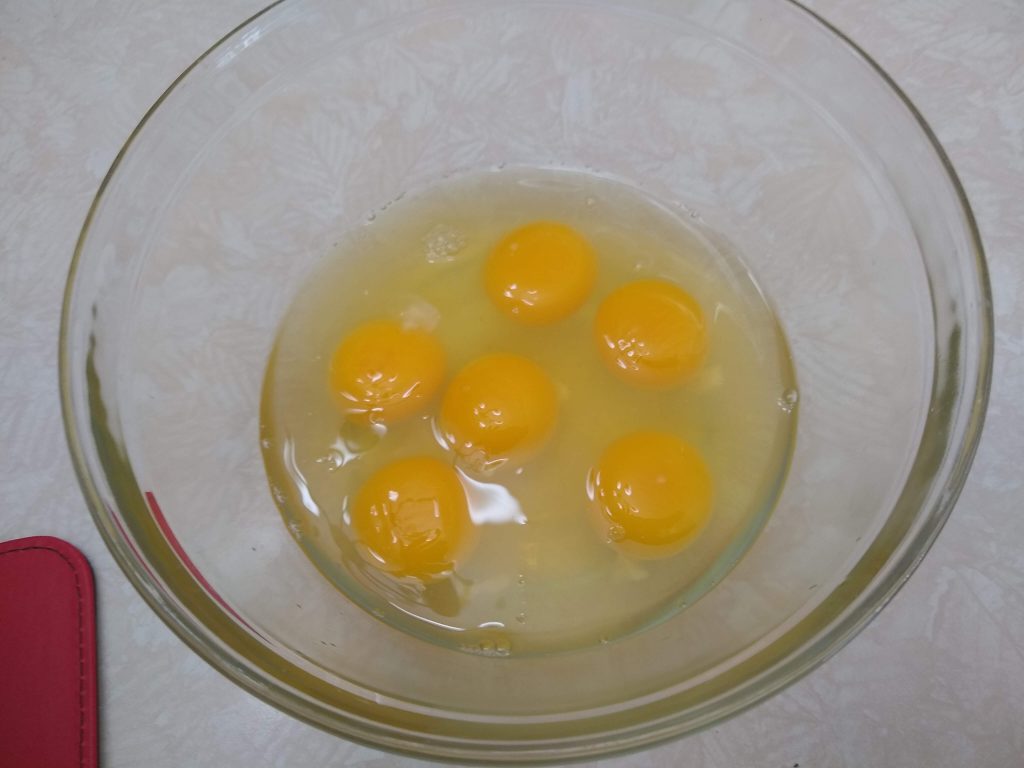
I cracked the eggs into a medium bowl.

Then I poured in a cup of half and half and the spices.

I whisked the mixture until it was blended evenly, and poured it into the quiche dish.

Finally, I sprinkled the Parmesan over the top before popping it in the oven at 350.

I baked it for 45 minutes, and let it rest for 15 minutes before slicing.

It turned out perfectly! The quiche was soft inside, with a slight crunch from the browned cheese on top, tangy feta, creamy mozzarella and spinach with just enough spices to give it that Mediterranean flavor that I love. It’s very satisfying yet low in carbs.

Cheesy Crustless Spinach Quiche

Servings:  6

  • Olive oil cooking spray
  • 1 tablespoon organic butter
  • 8 ounces fresh baby spinach
  • 2 cloves garlic, minced
  • Pinch of salt
  • 1/4 cup crumbled feta cheese
  • 1 cup shredded Italian cheese
  • 6 large organic eggs
  • 1 cup organic half and half
  • 1 tablespoon fresh dill weed
  • 1/2 teaspoon dried oregano
  • 1/4 teaspoon sea salt
  • 1/4 teaspoon black pepper
  • 1/4 cup grated Parmesan or Romano cheese

Directions:

Preheat the oven to 350 degrees and spray a 9-inch quiche or deep pie dish with olive oil.

Heat a large skillet over medium high heat, add the butter, and cook the spinach until just wilted.  Add the garlic and a pinch of salt and stir for another few seconds, then remove from the heat.

Place the spinach in a colander and squeeze out the liquid with the back of a spoon.  Place the spinach in the greased dish and distribute evenly over the bottom.

Sprinkle the feta and Italian cheese blend over the spinach.

In a medium bowl, use a whisk to beat the eggs with the cream and spices.  Pour the egg mixture over the cheese and spinach in the dish.

Sprinkle the Parmesan or Romano cheese evenly over the top. 

Place in the oven and bake for 40-45 minutes, or until set.  While baking it will rise a few inches over the top of the dish, so make sure there’s room in the oven.  After you remove it, it will return to the normal level.

Let cool for 15-20 minutes to make it easier to slice.

Variations:  If you don’t have fresh spinach, thaw a package of frozen spinach, squeeze out the liquid, add a bit of garlic, salt and a drizzle of olive oil and place in the quiche dish, then proceed to add the cheeses, and remaining ingredients.