Grain-Free Tabouli Salad

I have always loved Middle-Eastern foods, such as falafel, hummus, baba-ghanouj and tabouli salad. But then I started cutting back on starchy grains and beans, so I stopped having many of these foods.

One day when I was making a recipe using riced cauliflower, it occurred to me that it would make a great substitute for the bulgur wheat used in tabouli.

First I cooked the riced cauliflower. It only took about 5 minutes in the microwave.

Once it was cool, I added all of the other ingredients. The key is plenty of fresh parsley, along with fresh lemon juice and olive oil. Add cucumbers, tomatoes and scallions, and any other vegetables that you like.

Then put it in the refrigerator for an hour to allow the flavors to develop.

It’s a delicious, refreshing and healthy salad to serve anytime.

Grain-Free Tabouli Salad

Servings:  4

  • 1 12-ounce bag frozen riced cauliflower
  • 1 large tomato, finely chopped
  • 1/2 large cucumber, peeled and diced
  • 1 bunch fresh parsley, minced
  • 3 scallions, finely chopped
  • Freshly squeezed lemon juice, (approx. 1 lemon)
  • 1/4 cup extra virgin olive oil
  • 1/2 teaspoon sea salt, or to taste
  • Black pepper, to taste

Directions:

Cook the cauliflower according to the package directions.  Cool and drain any excess liquid.

Add all of the remaining ingredients and mix thoroughly.  Chill in the refrigerator for at least 1 hour before serving.

Jambalaya

I have been making Jambalaya for years, even before I visited New Orleans many years ago. I started out trying to follow various recipes, but over time I changed a few things, and this is my favorite version.

It’s delicious, full of flavor, and you can make it really spicy, or mild, depending on who you’re cooking for. It’s great for leftovers, too, and freezes well.

I typically like to use chicken thighs and Andouille sausage, but many people like to add shrimp, chicken breast or ham. Some people don’t add tomatoes. You can pretty much add whatever you want. It doesn’t take that long to throw everything into the pan, then let it simmer. Or you can use a slow cooker, if you prefer.

If you don’t have Creole seasoning, you can use 3/4 teaspoon salt, plus a dash of black pepper, cayenne pepper and garlic powder. The sausage is also salty, so be careful not to use too much salt. Add more cayenne pepper if you like it extra spicy.

Some recipes advise you to add chicken broth and cook the rice in the same pan with everything else, but I find that it’s much better to cook the rice separately. Then each person can add as much or as little rice as they like to the bottom of their bowl, and it won’t be mushy and overcooked.

I like to serve it over riced cauliflower that has been cooked with a bit of butter and salt. My husband likes regular rice, so I will mix in some cauliflower rice with a small amount of regular rice, and he doesn’t know the difference.

Jambalaya

Servings:  4

  • 2 tablespoons avocado oil (or olive oil)
  • 1.5 pounds boneless, skinless, organic chicken thighs (free range), chopped into bite-size pieces
  • 1 teaspoon Creole seasoning, such as Tony Chachere’s
  • 1 medium onion, diced
  • 1 red or green bell pepper, seeded and diced
  • 2 stalks celery, diced
  • 3 cloves garlic, minced
  • 5 ounces natural, nitrate-free Andouille sausage, diced
  • 1/2 teaspoon dried thyme
  • 1 bay leaf
  • 1/2 cup finely chopped fresh parsley
  • 1 (14.5-ounce) can diced tomatoes with green chilies

Directions:

Heat a large skillet over medium high heat, add the oil, the chicken and the Creole seasoning.  Saute the chicken for about 5 minutes, until starting to brown. 

Add the onions, peppers and celery to the pan and cook until softened, 5-10 minutes.  Add the garlic, sausage, spices and parsley, and stir for about 1 minute.  Then add the tomatoes with the juice and stir.  Cover the pan, reduce heat to low and simmer for 45 minutes.   

Taste to adjust the seasonings.  Serve over cooked riced cauliflower, or regular rice.  Add a dash of hot sauce, such as Frank’s Red Hot, if desired.

Variations:  Add raw peeled and deveined shrimp to the pan during the last 5 minutes of cooking.  Sprinkle minced green onions and more parsley on top before serving.

Reuben Rollups

One of my favorite deli meats is Vienna corned beef. I know, it’s not the healthiest option to have on a daily basis, but every now and then it’s nice to splurge, and St. Patrick’s Day is one of those times.

When I was young, I have fond memories of walking home from a day at the beach with my family, and stopping at the corner store to buy some corned beef and dill pickles. I would make a sandwich with corned beef, pickle slices and Miracle Whip on white bread. I know, crazy, right?

I learned that the traditional way to eat a corned beef sandwich is on rye bread with mustard. And I did have it this way at the Carnegie Deli in New York several years ago.

These days, I only eat corned beef on special occasions. These low-carb Reuben Rollups give you all the flavors of a Reuben sandwich, but without the bread. They are a rich, tasty and satisfying treat to enjoy on a day like St. Patrick’s Day.

Start by laying out 3 slices of corned beef and a slice of Swiss cheese.

Spread on some Thousand Island dressing (easy to throw together with just 3 ingredients), and a spoonful of drained sauerkraut.

Then just roll up and enjoy!

Reuben Rollups

Servings:  1 (two rollups)

  • 6 thin slices deli corned beef
  • 2 slices Swiss cheese
  • 4 teaspoons Thousand Island dressing (recipe below)
  • 2 tablespoons sauerkraut, rinsed and drained

Thousand Island Dressing

Whisk together 1 tablespoon mayonnaise, 1 teaspoon natural ketchup and 1/2 teaspoon dill pickle relish.

Directions:

Lay three corned beef slices on a cutting board, slightly overlapping.  Place a piece of cheese in the center.   Spread 2 teaspoons of dressing over the meat and cheese, then add 1 tablespoon of sauerkraut to the bottom end of the meat.  Starting from the bottom, roll tightly, making sure that the filling stays inside.  Place on a plate.  Repeat to make the second rollup.

Variations:  Substitute the mustard of your choice for the Thousand Island Dressing.  If you don’t like sauerkraut, fill the roll with a dill pickle spear.

Roasted Green Beans

One of my favorite ways to prepare vegetables is to roast them. It doesn’t take very long, only about 15 minutes after the oven is preheated, and you don’t have to wash any pans if you use parchment paper.

The best reason is the intense flavor that roasting provides. The beans remain slightly crisp, but become lightly charred in spots, creating a delicious, caramelized, salty and spicy treat.

All you need to add is a bit of olive oil, salt and LOTS of freshly ground black pepper. The pepper is the key to giving them that spicy kick. It’s so simple, you can pop them in the oven while you prepare other foods.

You can roast pretty much any vegetables: broccoli, cauliflower, zucchini, onions, eggplant, mushrooms, peppers, tomatoes, etc. Experiment with your favorites and hopefully you and your family will end up eating more vegetables, which is always a good thing.

Roasted Green Beans

Servings: 4

  • 1 pound fresh green beans, trimmed
  • 2 tablespoons extra virgin olive oil
  • 1/4 teaspoon sea salt
  • 1/4 to 1/2 teaspoon freshly ground black pepper

Directions:

Preheat the oven to 425 degrees.

Add parchment paper to a large sheet pan, and toss the green beans with the oil, salt and pepper, spreading them evenly over the pan.

Roast for 10 minutes, and stir the beans to prevent browning too much on one side. Continue roasting for another 5 minutes. Remove from the oven, stir and let cool for a couple of minutes. Taste to adjust seasonings.

Roasted Sweet Potatoes

Sweet potatoes are high in fiber, vitamin C, potassium, B vitamins, manganese, magnesium and copper. They get their orange color from beta-carotene, an antioxidant. Not only are they nutritious, but they are delicious!

My favorite way to cook them is to simply slice and roast them in the oven for about 15 minutes. They cook much faster than white potatoes.

My husband doesn’t care for sweet potatoes (which means more for me!), but I will make some white potatoes for him at the same time, and it doesn’t require much more effort.

Feel free to add any other spices to your potatoes. In this case, I just used salt, pepper and rosemary, but you could add thyme, oregano, basil, or even cinnamon.

Roasted Sweet Potatoes

Servings:  4

  • 2 medium sweet potatoes, peeled and sliced into 1-inch rounds
  • 2 tablespoons extra virgin olive oil
  • 1/4 teaspoon sea salt
  • 1/4 teaspoon black pepper
  • 1/4 teaspoon dried rosemary

Directions:

Preheat the oven to 425 degrees.

Add parchment paper to a large sheet pan and add the potatoes in a single layer, not overlapping.  Mix the oil and spices in a small bowl and brush it evenly on top of the potatoes.  Turn them over and brush the oil on the other side.

Roast for 10 minutes, and using tongs or a spatula, turn the potatoes over.  Continue roasting for another 5 minutes, or until tender.  Remove from the oven, and let cool for a couple of minutes.  Taste to adjust seasonings.

Omelet with Mushrooms and Goat Cheese

An omelet can be an easy, delicious, and filling meal that doesn’t have to be limited to breakfast, but any time of day. The best part is that most of us have eggs on hand, then you can use up leftovers or any vegetables, meats or cheeses that you might have around as the filling.

An omelet can be a bit tricky to cook when you first attempt it. You want to be sure that you have all the fillings ready to go before you put the eggs in the pan. They cook very quickly and require your full attention. If you wait too long, you’ll end up with overcooked or burnt eggs.

So if you want to add any vegetables to your omelet, start by sauteing them first, in a little butter or oil. In the photo below, I was making a double batch of filling, so I used a bigger pan.

Once the vegetables were browned and tender, I moved them to a plate. Then I added the beaten eggs to the smaller omelet pan.

You want to wait just a few seconds for them to start cooking. Then take your wooden spoon and start pushing them in from the edges, while at the same time tilting the pan so the liquid in the center moves to the outside.

Once the eggs are almost cooked, lower the heat and add little bits of the goat cheese evenly over the surface.

Next, pour the mushroom and onion mixture over one half of the omelet.

Then take your spoon and loosen the eggs all the way around the pan, to make sure the omelet is ready to slide out easily.

Tip your pan so the omelet slides onto a plate, starting with the side containing the mushrooms. As soon as it hits the plate, use the pan to fold over the second half, then press the top down slightly with your spoon.

Omelet with Mushrooms and Goat Cheese

Servings:  1

  • 2 tablespoons organic butter, divided
  • 4 ounces white button mushrooms, sliced
  • 1/4 medium yellow onion, peeled and thinly sliced
  • 1/8 teaspoon dried thyme
  • 1/8 teaspoon dried rosemary
  • 1/8 teaspoon sea salt
  • 1/8 teaspoon black pepper
  • 2 large organic eggs
  • 1 tablespoon organic cream or half and half
  • A pinch of salt and pepper
  • 1 ounce goat cheese

Directions:

In a small skillet, melt 1 tablespoon butter over medium heat and add the first 7 ingredients.  Saute for several minutes until mushrooms and onions are soft and beginning to brown.  Remove from the pan onto a plate.

In a small bowl, beat 2 eggs with cream and a pinch of salt and pepper.   Add the remaining tablespoon of butter to the pan, when it’s melted, then pour in the eggs.  Wait a few seconds until they begin to set, then start pushing them in from the sides with a wooden spoon, while tipping the pan, so that the uncooked eggs in the middle move to the outer edges. 

When the surface no longer has big puddles of uncooked eggs, lower the heat and add dollops of goat cheese all around, then spoon the mushroom mixture over one half of the eggs.  Loosen the omelet from all sides of the pan with the spoon, and tip the pan sideways to slide the omelet onto a plate, mushroom side first.  Use the pan to fold the omelet in half as you release it.

Berry Banana Blast Smoothie

Smoothies are a great way to get a lot of fruits, vegetables and protein into your system quickly. Especially when you’re rushing to work or need a quick snack after a workout, it’s the perfect thing to drink on the go.

I prefer the NutriBullet blender to make smoothies, because of the high powered motor, and the ease of cleaning compared to a regular blender. I can throw in apples with the peels, nuts and seeds, and it all blends together smoothly, making it easier for your body to absorb the nutrients.

My husband was skeptical when I first make him a smoothie, due to the green (or in this case, purple) color. But once he tasted it, he was hooked! He said that he definitely felt more energetic during his workout after drinking it. To this day, he still calls it “green slop.”

When I make smoothies, I always add either spinach or kale (organic), a bit of fruit, as well as flaxseed and nuts, and some kind of protein powder. In this case, I’m using egg white protein.

This time I had some fresh bananas on hand, but I also like to use frozen berries to make the smoothie cold, thick and creamy, like a shake.

I find that blending the spinach, fruit, nuts and water first works best, then I add the protein powder last. I have had some protein powders expand once I added them to the liquid, which would loosen the lid of my container during blending and start leaking. Not good!

So just add the first bunch of ingredients, blend thoroughly, open the lid and throw in the protein powder, and blend once again for a few seconds.

You can even prepare it the night before if you find that you are too busy in the mornings.

Berry Banana Blast Smoothie

Servings:  1

  • 1 cup (packed) raw organic spinach (or kale)
  • 1 cup mixed fruit (bananas, strawberries, blueberries), preferably frozen
  • 1 tablespoon ground golden flaxseed
  • 1 tablespoon raw walnuts
  • 1/2 teaspoon ground cinnamon
  • 1/2 scoop (3 tablespoons) vanilla egg white protein powder, (naturally sweetened with stevia)

Directions:

Add the first 5 ingredients to a high speed blender cup, such as the Nutribullet.  Add 1 cup of water and blend until all ingredients are thoroughly combined.  Add protein powder and blend for a few more seconds.  Serve.

The smoothie can be prepared the night before and stored in the refrigerator for breakfast.  Just stir and enjoy.

Variations:  You can substitute any fruits that you prefer, such as blackberries, raspberries, apple or pineapple.  Use whey or pea protein powder, as long as it doesn’t contain sugar or artificial sweeteners. Instead of walnuts, use almonds, pecans or cashews.

Caesar Salad

One of the very best, simple salads! It’s such a treat to have it prepared tableside at an upscale restaurant. But when that’s not an option, it’s super easy to make at home.

I like to add extra shredded Parmesan cheese and freshly ground black pepper to each serving. I know that many people love the crunchy croutons that usually accompany Caesar salads, but I prefer to leave them off and save the excess carbs. Plus, it’s still delicious without them! I have served this to guests many times and no one has questioned me about the missing croutons.

To make the salad a full meal, just add some protein, like grilled chicken or shrimp.

Caesar Salad

Servings:  1 entrée or 2 side salads

  • 3 generous handfuls of organic romaine lettuce, torn into bite size pieces (approx. 3 cups)
  • 2 tablespoons Caesar Dressing
  • 2 tablespoons shredded or shaved Parmesan cheese

Directions:

Add lettuce to a large bowl.  Drizzle with Caesar dressing and toss to coat evenly.  Sprinkle with cheese and serve.  Add more freshly ground black pepper, if desired.

Variations:  Add grilled chicken,  steak or shrimp.

Caesar Dressing

This is one of my favorite dressings. It’s creamy, rich and lemony, along with the salty tang of anchovy paste and Parmesan cheese.

I know, a traditional Caesar dressing contains raw egg, but I prefer to avoid the potential risk for salmonella, which could be a concern. Instead, I substitute a high quality mayonnaise.

Some store bought versions are way too thick, and very salty. Try making your own, and see the difference!

Caesar Dressing

Servings:  8

  • 1 clove garlic, minced
  • 1 teaspoon anchovy paste
  • 1 teaspoon Dijon mustard
  • 1 teaspoon Worcestershire sauce
  • 1 teaspoon red wine vinegar
  • Freshly squeezed lemon juice, (approx. 1 lemon)
  • 2 tablespoons mayonnaise, preferably made from avocado oil
  • 2 tablespoons grated Parmesan cheese
  • 1/4 teaspoon black pepper
  • 2/3 cup extra virgin olive oil

Directions:

Add the first 5 ingredients to a measuring cup and whisk to combine.  Add enough lemon juice to reach 1/3 cup.  Add mayonnaise, cheese and pepper, then slowly add olive oil while whisking until you reach 1 cup.  Transfer to a sealed container.  It will stay fresh in the refrigerator for 2-3 weeks.

Cabbage Soup with Chicken

I like to make a variety of soups in the winter. It’s so comforting on a cold day, as well as nutritious and filling.

I usually make a big batch, then freeze the leftovers in individual portions to make it easy to heat up later.

This recipe is reminiscent of minestrone, but without the starchy pasta and beans. It’s full of delicious, healthy vegetables, and a small amount of chicken to add a bit of protein. It’s not a very heavy soup; you can add less broth or more tomatoes if you like it thicker. I serve it with a big green salad to round out the meal.

I start by sauteing vegetables in avocado oil in a large soup pot.

While the onions, carrots and celery cook, I slice the cabbage.

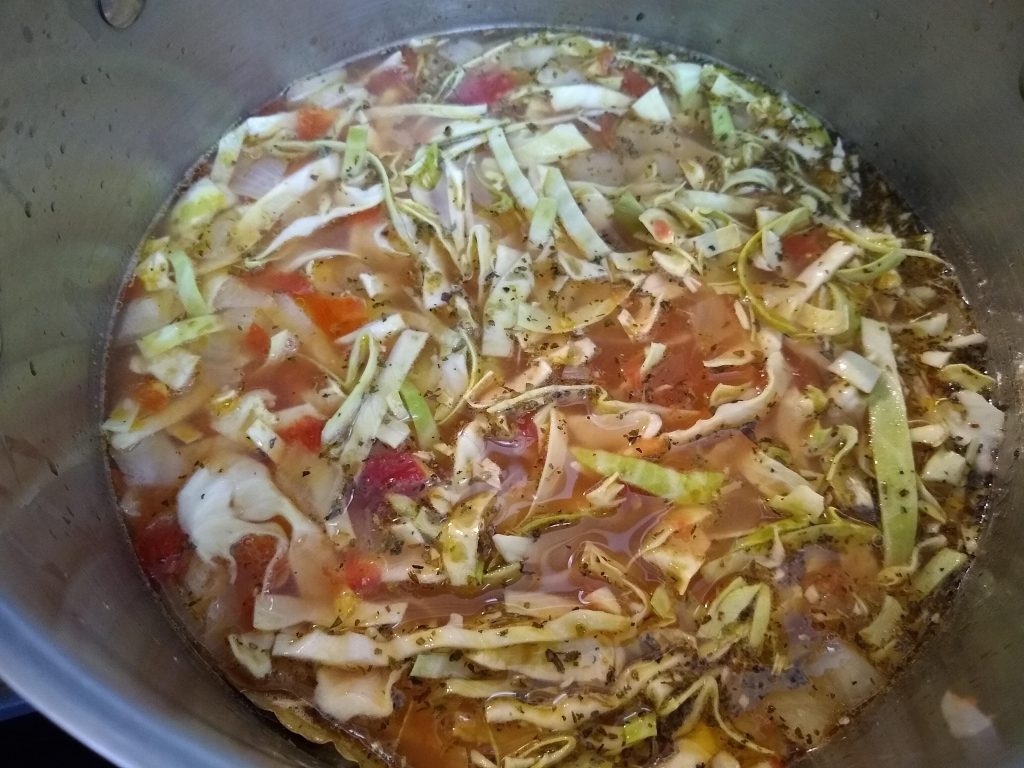
Once the vegetables start to soften and brown, I add all the other ingredients.

Now you just have to cover it and let it simmer for an hour. Remove the chicken and shred it before returning it to the pot. Then add a handful of chopped fresh basil. It really adds a nice bright flavor. Here is the finished soup, ready to enjoy!

Cabbage Soup with Chicken

Servings:  8

  • 1/4 cup avocado oil
  • 1 medium yellow onion, diced
  • 2 large carrots, peeled and diced
  • 2 large celery stalks, diced
  • 4 cloves garlic, minced
  • 1/2 head green cabbage, cored, cut in half and thinly sliced
  • 2 organic boneless,skinless chicken thighs
  • 1 (15-ounce) can diced tomatoes, no salt added
  • 2 quarts low sodium chicken stock
  • 1 bay leaf
  • 1 teaspoon dried basil
  • 1 teaspoon dried oregano
  • 1 teaspoon sea salt
  • 1/2 teaspoon black pepper
  • 1/4 teaspoon dried thyme
  • 10 leaves fresh basil, finely chopped

Directions:

In a large pot, saute onions, carrots and celery in oil over medium heat until starting to brown.  Add the garlic and cabbage and cook for another minute.  Add the chicken, tomatoes, stock, and all spices except fresh basil. 

Bring to a boil, then lower heat to a simmer.  Cook gently, partially covered, for 1 hour.  Remove chicken and shred the meat, then return it to the pot.  Add the basil.  Taste to adjust seasonings.

Variations:  Add cooked macaroni, cooked beans, or freshly grated parmesan cheese.  If you prefer a more tomato-based soup, replace some of the chicken broth with a can of tomato puree.