Appetizers and Snacks

The Best Hummus

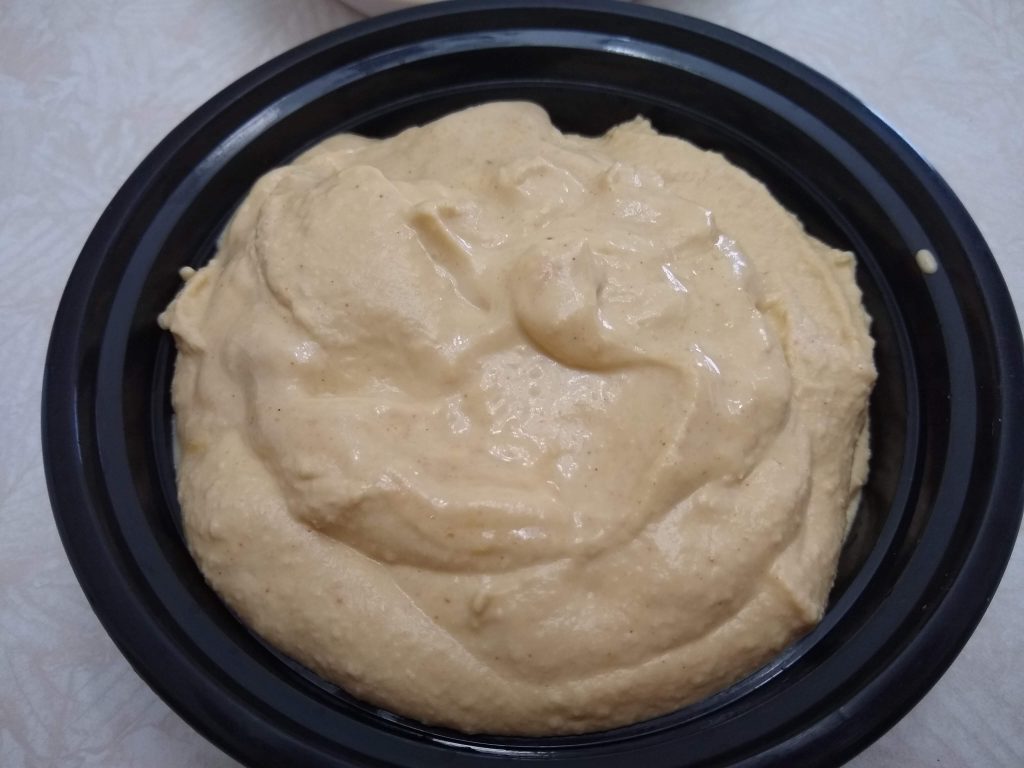
Hummus is one of my favorite foods. I like a lot of spice and extra lemon juice in mine. I’ve eaten it for breakfast spread it on Ezekiel toast with sliced tomatoes on top, or as a snack with tortilla chips, crackers or raw vegetables.

This truly is the best recipe for hummus that I’ve found, and I have tried many versions over the years. It’s from Lisa Bryan at Downshiftology.com: https://downshiftology.com/recipes/3-minute-hummus/

I had given up on making it at home since it never turned out well, made a big mess, and turned out lumpy and bland. But due to the recent pandemic, one day I went shopping and all the hummus was gone from the grocery store. I had the ingredients at home, so decided to try another recipe.

I think that the secret to making this so light and creamy is that it’s made in a high powered blender (like a NutriBullet). And you have to add quite a bit of liquid to make sure it blends smoothly.

The basic ingredients include canned chickpeas (plus some of the liquid), tahini paste, fresh lemon juice, olive oil and spices like garlic, cumin, and salt. The original recipe didn’t include cayenne pepper, but I think it adds a nice kick!

Just place all of the ingredients in your blender and whip it up until it’s the light and creamy consistency that you prefer. Taste it to adjust the seasoning. Add more salt, lemon or other spices as needed.

Hummus is such a versatile dip/spread. You can add so many other ingredients such as roasted red peppers or eggplant, olives, extra garlic, tomato and basil, parsley, jalapenos, etc.

So make a batch of this tasty spread today! It’s a great snack full of fiber and healthy fats.

The Best Hummus

Serves 8

  • 30 ounces canned chickpeas (garbanzo beans), drained with liquid reserved (two 15-ounce cans)
  • 1/3 cup chickpea liquid, or more, as needed
  • 1/2 cup tahini
  • 1/4 cup olive oil
  • 2 lemons, juiced
  • 2 garlic cloves
  • 1 teaspoon cumin
  • 1/2 teaspoon salt
  • 1/4 teaspoon cayenne pepper, optional

Directions:

Add all the ingredients to your Vitamix, NutriBullet  or other high-powered blender and secure the lid.  

Turn the blender on high for 30 seconds (or more for a creamier texture).   Add more chickpea liquid (aquafaba), if desired, for a softer hummus.

Tzaziki (Cucumber Yogurt Dip)

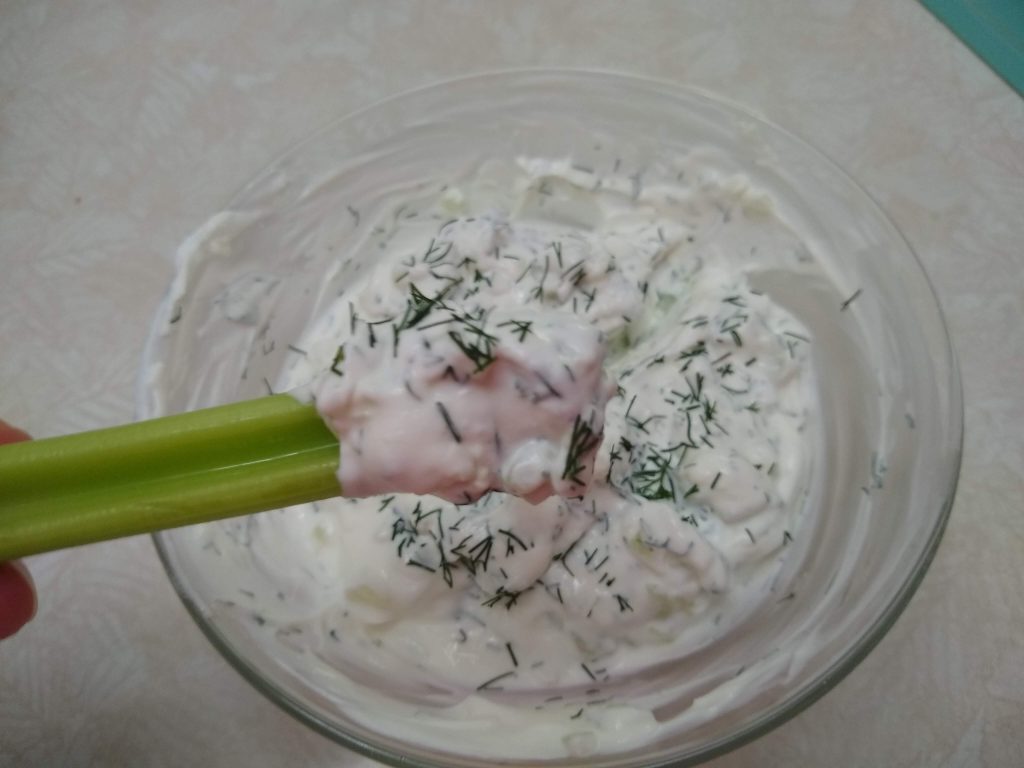
Tzaziki is one of my favorite sauces/dips. I used to order it at a restaurant in Greektown in Chicago (along with saganaki, taramasalata, etc.). It’s a delicious, thick and creamy dip, with minced or grated cucumbers, yogurt, lemon juice, salt and a hint of garlic. I like to add some fresh dill weed, but it’s not necessary.

If you’ve ever had a gyros sandwich, a version of this sauce is drizzled on top.

Tzaziki is so versatile. You can serve it as a dip with celery, carrots and other raw vegetables, or pita bread/chips. I like to serve it alongside grilled chicken kebabs, fish, or a dish I like to make with ground turkey or lamb that has the flavor of gyros. I will share that recipe in the near future.

You start by peeling and seeding a large cucumber, then chopping it very finely. I add a bit of salt and place the cucumbers on some paper towels to drain.

After about 15 minutes, you can pick up the paper towels with the cucumbers inside and squeeze over the sink to release most of the liquid. This prevents your dip from becoming watery. Place the drained cucumbers into a medium bowl.

Next, add the yogurt and garlic.

Squeeze in your lemon juice, add some salt and fresh dill weed. Mix thoroughly. That’s all there is to it! Try some on a crisp stalk of celery.

Tzaziki (Cucumber Yogurt Dip)

Servings:  4-6

  • 1/2 large cucumber, peeled, seeded and minced
  • 1 cup Greek yogurt, preferably organic
  • 1 clove garlic, minced
  • Juice from 1/2 lemon
  • 1 tablespoon fresh dill weed, minced
  • 1/4 teaspoon sea salt

Directions:

Place the minced cucumber on a double layer of paper towels in a medium bowl.  Add a sprinkle of salt and leave at room temperature for 15 minutes.

Wrap the paper towels around the cucumbers and squeeze out as much water as possible.  Place the cucumbers back in the bowl.

Add yogurt, garlic, lemon juice, salt and dill weed and stir to combine.  Taste and add more salt, lemon or dill if desired. 

Optional:  add a drizzle of extra virgin olive oil.

Chunky Guacamole

Avocados are very nutritious and contain a wide variety of nutrients, including 20 different vitamins and minerals, plus fiber and heart-healthy monounsaturated fatty acids.

They are great mashed and made into guacamole, or simply sliced or diced and added to salads, on top of burgers, chicken or fish. They can also be used in sweet recipes, such as chocolate mousse.

In honor of Cinco de Mayo coming up in a few days, I am including my highly praised, go-to dip for parties, and pretty much any occasion.

It can be a bit tricky choosing an avocado at the store. You don’t want them too soft, which means over-ripe and probably brown inside. If I have a few days before I need to use them, I will buy ones that are still hard, and let them ripen on my kitchen counter. You can also put them in a paper bag and they will ripen faster.

It’s very important when cutting into an avocado that you do it on a cutting board, NOT while holding it in your hand. I have seen people on TV holding one half of the avocado and jamming the blade of their knife into the pit to remove it. Instead, just use a small spoon to scoop the pit out.

So now on to the guacamole recipe. The basic recipe is very simple…just mashed avocado, salt, and acid, such as lemon or lime juice. But I like to add a bit of chopped onion, jalapeno pepper and cilantro.

It’s best to make sure everything is very finely chopped, then mix it all together. And I don’t mash the avocado too much. I think it’s better kept a bit chunky.

You can make the guacamole ahead of time, (just an hour or two), and place it in a bowl with plastic wrap touching the surface so that it doesn’t brown.

You can serve it with carrot sticks, celery, chips, or on top of Zesty Turkey Taco Salad.

Chunky Guacamole

Servings:  2-4

  • 1 large or 2 small avocados
  • 2 tablespoons minced red onion
  • 1 tablespoon fresh lemon or lime juice
  • 1 tablespoon finely chopped cilantro
  • 2 teaspoons minced jalapeno, seeds and ribs removed, optional
  • 1/4 teaspoon sea salt, or to taste

Directions:

Slice the avocados in half lengthwise and scoop out the pits with a spoon.  Discard pits and scoop the flesh into a bowl.  Mash with a fork, leaving it a bit chunky.  Add the remaining ingredients and stir to combine.  Taste to adjust seasonings.  Add more lemon juice or salt, if necessary.

Variations:  Add finely diced tomato, and/or minced garlic.

Easy Deviled Eggs

If I’m in the mood for a savory snack that’s creamy, rich and satisfying, one of my go-to recipes is deviled eggs. I can prepare a batch on the weekend, and keep them in a sealed container in the refrigerator to snack on all week. They make great appetizers for a party, too.

One of the most difficult parts of making deviled eggs is cooking perfect hard-boiled eggs. I have over cooked them, under cooked them, and then had the peels stick to the eggs so that half of the egg white would peel off along with the shell!

Then I received an electric Dash egg cooker for a gift, and it changed everything! It comes with a tiny device that you use to prick a hole in the top of each egg shell before cooking, which makes it easy for the shells to slide right off when they’re finished cooking. The instructions tell you the amount of water to add, you plug it in, turn it on, and the whole process is very quick.

My one complaint is the loud noise that the machine makes when the eggs are finished…it can be quite startling! And I found that I need to keep the eggs in the cooker for 5 additional minutes after the buzzer sounds, so that they are perfectly cooked.

If you don’t have an egg cooker, no problem! I also provide instructions for cooking eggs the usual way.

Easy Deviled Eggs

Servings:  6

  • 6 large eggs, free-range
  • 1/4 cup mayonnaise, preferably organic and made from avocado oil
  • 1 scallion, green parts only, finely chopped
  • 1 teaspoon Dijon mustard
  • Salt and pepper, to taste
  • Paprika

Directions:

Using a Dash egg cooker, add the specified amount of water and place eggs on the tray. Close the lid and turn on.  When the timer goes off, turn off the machine and unplug, but leave the lid on for 5 more minutes.  Fill a bowl with ice cubes and cold water.  Place the cooked eggs into the ice bath and let cool.

To cook the conventional  way, place eggs in a pot covered with cold water.  Bring to a boil, cover the pot and turn off the heat.  Let stand for 12 minutes.  Fill a bowl with ice cubes and cold water.  Place the cooked eggs into the ice bath and let cool.

Tap the cooled eggs on several sides to loosen the shells, then peel under running water.  Place the eggs on paper towels to dry.

Cut the eggs in half lengthwise, and drop the yolks into a small bowl.  Mash the yolks with a fork until smooth.  Add the mayonnaise, scallion, mustard, and salt and pepper to taste, and mix well.  (Note that the mustard is quite salty, so you may not require additional salt.)

With a small spoon, fill each egg with the mixture and sprinkle with paprika.

Variations:  There are endless combinations…you can add diced bacon, jalapenos, roasted red peppers, celery, pickles or relish, minced parsley or other fresh herbs, cayenne pepper or hot sauce.

Sweet and Salty Roasted Nuts

I often eat raw nuts as a snack, but sometimes they can be a bit boring. One day, I noticed some almonds that I had purchased weren’t as crunchy as they should have been…perhaps they were slightly stale. So I decided to roast them. What a drastic improvement! They were completely transformed into crunchy, flavorful, sweet and salty perfection.

The great thing about roasting them yourself is that you can control what kind of oil you use and the amount of salt, and you can vary the spices that you add. I like mine lightly salted and slightly sweet, so I add some sea salt and granulated stevia.

This recipe is so simple and only takes 10 minutes. You can serve these nuts as a snack, sprinkled over salads, or ground up to use in a pie crust.

Sweet and Salty Roasted Nuts

Servings:  16

  • 2 cups of raw nuts of choice (walnuts, pecans, almonds, cashews, etc.)
  • 1 teaspoon extra virgin olive oil
  • 1 packet (or 3/4 teaspoon) granulated stevia sweetener
  • 1/4 teaspoon sea salt

Directions:

Preheat oven to 350 degrees.  Line a cookie sheet with parchment paper.

Toss the nuts with the oil, sweetener and salt and spread evenly on the tray.  Bake for 10 minutes, stirring after 5 minutes.  Be careful not to burn.

Cool completely, then store in an airtight container.  They will stay fresh at least 2 weeks.

Variations:  Add additional spices such as cayenne or black pepper, any dried herbs such as rosemary, thyme or oregano.  For a sweeter treat, add a touch more stevia, plus cinnamon and nutmeg.