Simply Roasted Cauliflower

All vegetables taste better roasted. They become sweet and caramelized, with a bit of charred flavor, just like you get from grilling. The most difficult step is washing and chopping, then you can just throw them in the oven and let the magic happen.

Cauliflower is so versatile, you can add many different spices to vary the recipe, depending on what you have a taste for. Are you serving it alongside Chicken Parmesan? Then add some oregano, basil and a touch of garlic powder.

Maybe you’re looking to spice it up with chili powder, cumin and cayenne pepper?

Do you want a rich, slightly decadent side dish? Drizzle on a bit of melted garlic butter.

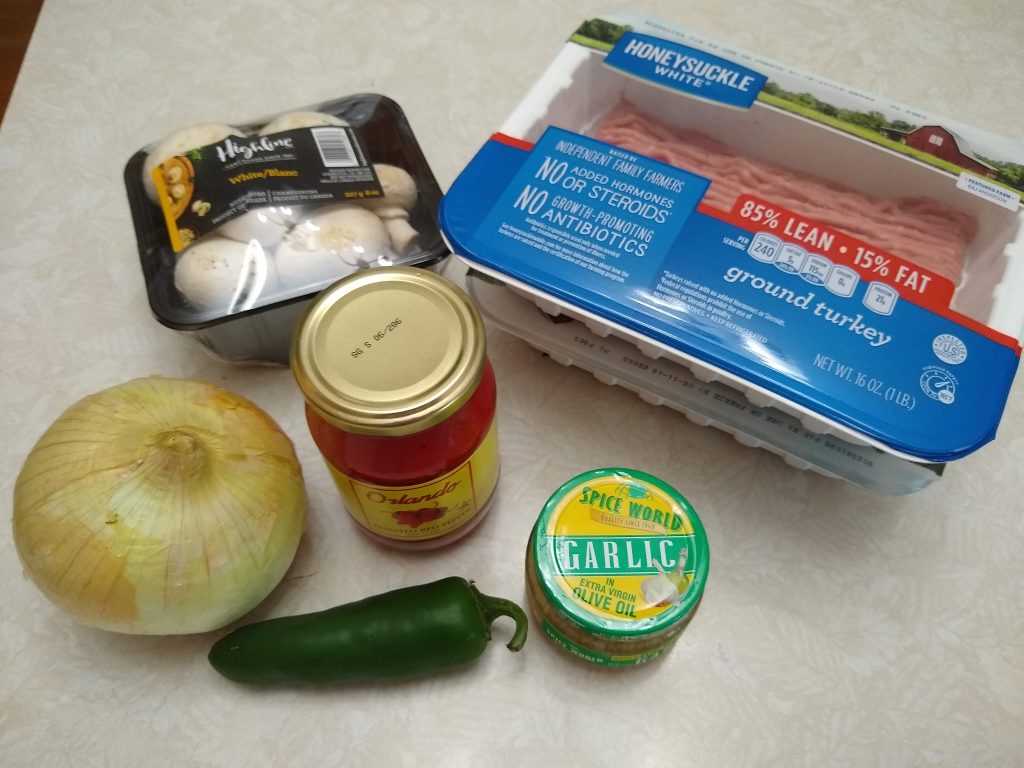
And if plain cauliflower doesn’t do it for you, add other vegetables like onions, peppers, broccoli or mushrooms. You just want to choose those that take the same amount of time to cook. (For example, you wouldn’t add chopped asparagus, because that cooks much more quickly.)

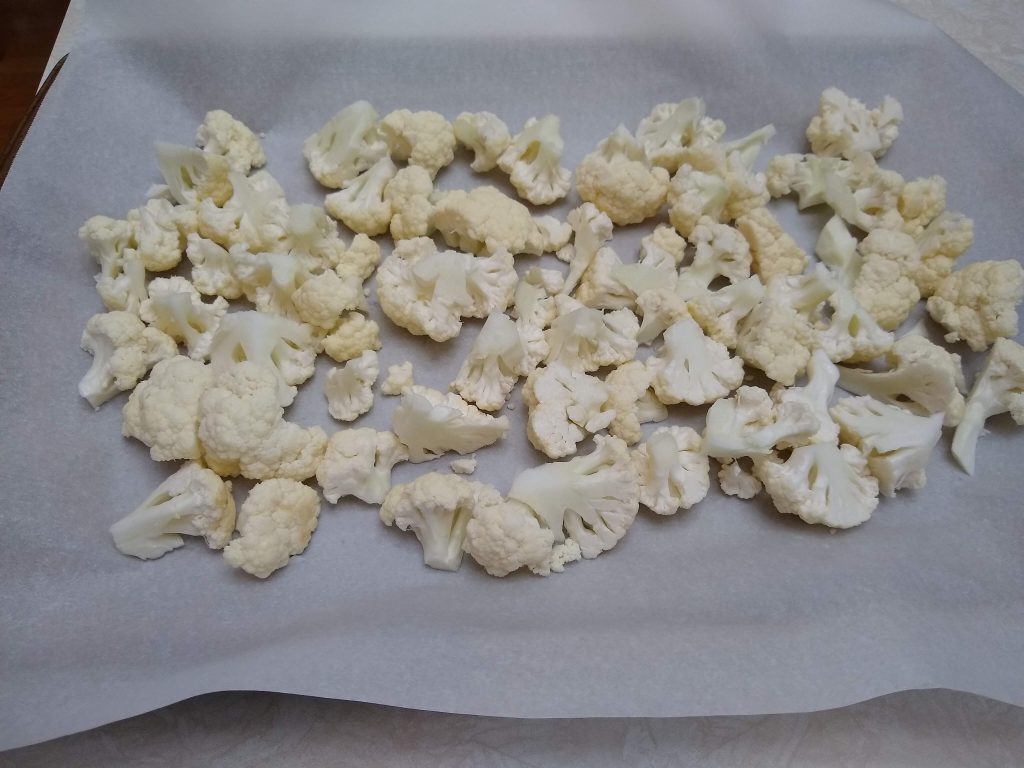
So here are the steps for the most basic version. First, chop the cauliflower into bite-size florets and place them on a baking pan covered with parchment paper.

Next, drizzle on avocado oil, salt and pepper, and mix thoroughly. I used pink Himalayan salt.

Place the pan into the oven at 425 degrees. It’s important to stir the cauliflower halfway through cooking (or at about 15 minutes), so it doesn’t get burned. Then put it back in for another 10 minutes, and it’s ready! Slightly browned in spots, but tender and delicious.

Simply Roasted Cauliflower

Servings:  4

  • 1 large head of cauliflower
  • 2 tablespoons avocado oil (or olive oil)
  • 1/4 teaspoon sea salt
  • 1/4 teaspoon freshly ground black pepper

Directions:

Preheat the oven to 425 degrees.  Place a piece of parchment paper on a large sheet pan. 

Slice the cauliflower in half, then in quarters.  Slice diagonally at the base of each quarter to remove the tough core and leaves and discard.  Then chop the cauliflower into small florets, and place them on the sheet pan.

Drizzle with oil, salt and pepper and toss to distribute evenly.

Roast for 15 minutes, then stir to prevent too much browning on one side.  Continue roasting for another 10 minutes.

Variations:  There are so many things you can do with cauliflower!  You can add different spices, such as rosemary, oregano or basil, or make it spicy with curry powder, cumin or cayenne.

Add large pieces of raw onion to the cauliflower before roasting, which become sweet and caramelized.  Or toss in any other vegetables, such as bell peppers or mushrooms.

For an even richer treat, melt a bit of butter with minced fresh garlic and drizzle it over the roasted cauliflower as it comes out of the oven.  Then sprinkle on minced parsley or chives.

Frittata with Chicken Sausage, Spinach and Onions

If you’re looking for a quick and easy meal to throw together using whatever leftovers or vegetables you have on hand, the frittata is the way to go.

It’s like an omelet, but instead of placing fillings inside the eggs and folding them over, you cook everything in the pan together, then top with cheese at the end. In a way, it’s easier and more forgiving. You don’t have to worry about tearing the omelet as you’re folding it, etc.

So, in addition to eggs, you start with some basic ingredients, such as vegetables, meat and cheese. In this case I’m using Chicken Sausage with Sun Dried Tomatoes and Basil, fresh organic spinach, sliced Vidalia onion, and shredded parmesan cheese.

The first step is to melt some butter in a small skillet, then add the onions.

After about 5 minutes, when the onions are soft and slightly browned, add the diced sausage.

Then add the fresh spinach.

It only takes a couple of minutes for the spinach to wilt. Then you’re ready to add the beaten eggs, with a little salt and pepper.

It helps to tilt the pan slightly to get the eggs evenly distributed. At this point, cover the pan and lower the heat. It only takes about 7 minutes for them to set.

So once the eggs look pretty firm, you can add the cheese. Turn off the burner and cover the pan again to let the cheese melt. Alternatively, you can place the frittata under the broiler for a minute, just until the cheese browns.

Frittata with Chicken Sausage, Spinach and Onions

Servings:  1

  • 1 tablespoon organic butter
  • 1/2 cup sweet onions, thinly sliced
  • 1 link (from a 10-ounce package) nitrate-free chicken sausage (sun dried tomato and basil), diced
  • A handful of fresh spinach leaves (approximately 1 cup packed)
  • 2 eggs, organic and free range
  • 1/8 teaspoon each, sea salt and freshly ground black pepper
  • 1/4 cup shredded Parmesan cheese

Directions:

Heat a small (8-inch) nonstick skillet over medium heat and add the butter.

Saute the onion for about 5 minutes, until soft and beginning to caramelize.

Add the sausage and spinach to the pan and cook until the spinach wilts.

Place the eggs in a small bowl along with salt and pepper and whisk to combine.  Pour the eggs into the pan, and tip to distribute them evenly.  Lower the burner to medium-low and cover the pan.

After about 7 minutes, the frittata should be almost set.  Sprinkle the cheese evenly over the top, turn off the heat and cover the pan for 5 more minutes.  Or, if you prefer, you can place the pan under the broiler for a minute to brown the cheese.

The frittata can be served hot or room temperature.

Variations:  Add different vegetables such as broccoli, mushrooms or bell peppers, different sausages such as Italian or Andouille, bacon, and/or different cheeses such as cheddar, pepper-jack or mozzarella.

Healthier Chicken Parmesan

Who doesn’t like the popular classic, cheesy, rich and delicious chicken parmesan?

My only problem with it, when it’s served in restaurants, is all the breading and possibly deep-frying that is done to it. Now that I’m trying to cut back on starchy carbs, I don’t want all that heavy breading on my chicken.

And it’s not necessary! This version is just as good, in my opinion, without being overly breaded, greasy and filling.

It’s also super quick to prepare. Just pound some boneless skinless chicken breasts until they’re thin, season them generously with salt, pepper and oregano and place in a heated skillet. Don’t worry, they don’t have to look perfect. Later they will be covered with cheese and sauce anyway.

Since they are pretty thin, they cook very quickly and only need about 3 minutes on each side.

Once they are browned on both sides, place them in an oven-proof tray or dish. Begin by placing provolone cheese over each piece. (Feel free to substitute mozzarella, if you prefer.) Just tear the cheese to fit the size of the chicken pieces.

Next, grab some warm marinara sauce, preferably homemade, but jarred sauce will work, too. Spoon a couple of tablespoons on top of each piece and spread it so it reaches the edges.

Finally, sprinkle on some shredded parmesan cheese (or romano, or mozzarella), and pop it into the oven for just a few minutes until the cheese melts and the chicken is fully cooked.

Here is the finished product, served alongside some fresh green beans. I prefer fresh vegetables or salad as a side, instead of starchy pasta.

This chicken would also be great with broccoli, spinach, asparagus, or spaghetti squash.

Healthier Chicken Parmesan

Servings:  4

  • 2 boneless, skinless organic chicken breasts, approximately  8 ounces each
  • 3/4 teaspoon sea salt
  • 1/2 teaspoon dried oregano
  • 1/4 teaspoon black pepper
  • 2 tablespoons avocado oil, or olive oil
  • 4 slices provolone cheese
  • 1/2 cup prepared marinara sauce
  • 1/4 cup shredded parmesan cheese

Directions:

Preheat the oven to 425 degrees.

Slice each chicken breast in half lengthwise to make 4 thin medallions.  Place wax paper over the chicken and pound it to about 1/2 inch thick.  Season both sides of the chicken with the salt, oregano and pepper.

Heat a large skillet over medium high heat, add the oil and brown the chicken for about 3 minutes on each side.

Remove the chicken from the pan and place it in an oven safe dish with enough room so the slices do not overlap.

Add one slice of provolone cheese to each piece of chicken, tearing the cheese to fit evenly. 

Add 2 tablespoons of marinara sauce to each piece, and spread evenly to cover.

Finally, sprinkle 1 tablespoon of parmesan cheese on top of each piece of chicken.

Place the chicken into the oven and bake for 5 minutes, or until the cheese is melted and the chicken is fully cooked.

Variation:  This recipe can easily be adapted for the barbecue grill.  Just grill the chicken for 3-4 minutes per side (or until fully cooked), top with cheese and warm marinara sauce and close the lid just until the cheese melts.

Asian Fried (Cauliflower) Rice

Growing up, my family loved to order Chinese takeout, as I’m sure many of you did (or still do). I remember having egg foo young, chop suey, and of course, fried rice. It was delicious and satisfying, with the little bits of egg, onions, peas and the salty tang from the soy sauce.

Fried rice is one of those dishes that many people give up when trying to eat healthier, low-carb meals. I know that for a time, I would only eat plain steamed rice to avoid excess fat. Now that we know fat is not the enemy, but instead excess starchy carbs, I realized that I can enjoy all the flavors of traditional fried rice, by just substituting riced cauliflower for regular rice.

I actually started making this for breakfast, since it’s a nice alternative to an omelet or traditional scrambled eggs. And I don’t always use riced cauliflower, but leftover cabbage, eggs and whatever vegetables I have on hand.

The key to getting the delicious Asian flavors is very simple: soy sauce (or coconut aminos), toasted sesame oil, and a bit of Sriracha hot sauce. Of course you can add other spices such as ginger and garlic, but it’s still very tasty with just the bare minimum of seasonings.

Feel free to experiment and add what you like. It’s a great way to use up leftovers! You can add meats, chicken, shrimp, spinach, broccoli, water chestnuts, sugar snap peas, etc.

Here are the ingredients I had on hand for today’s recipe: frozen riced cauliflower, eggs, green cabbage, frozen peas, carrots and green onions, as well as the soy sauce, sesame oil and Sriracha.

I popped the bag of riced cauliflower in the microwave for 5 minutes. In the meantime, I started by scrambling 2 eggs in a large nonstick skillet.

Next, I removed the cooked eggs to a plate.

Note, there’s no need to clean or wipe out the egg residue from the pan, just add a bit more oil and throw in the cabbage and carrots (or any vegetables that need a bit longer to cook).

Next add the cooked riced cauliflower. After microwaving, it could have excess moisture that you want to eliminate.

After a few minutes, add the peas and green onions, and just cook until heated through.

Finally, add the scrambled eggs back to the pan, along with the Tamari, sesame oil and hot sauce, and mix thoroughly. Of course, the hot sauce is optional. Be sure to taste it once everything is combined. You may want to add more salt or other seasonings.

I know that this recipe has a few steps and involves chopping up several vegetables, but it really comes together quickly, in only 15-20 minutes. You will be happy that you took the time to make it. It can be served for breakfast, as a side dish with other Asian stir-fry components, such as beef, pork, chicken or fish, or you can add the meat directly to the fried rice and serve it as the main course.

Asian Fried (Cauliflower) Rice

Servings:  4

  • 1 (10-ounce) package frozen riced cauliflower
  • 2 tablespoons avocado oil (or olive oil), divided
  • 2 eggs, organic and free range
  • 1 cup chopped green cabbage
  • 1/2 cup slivered carrots
  • 1/2 cup frozen green peas
  • 1/2 cup finely chopped green onions
  • 2 tablespoons Tamari soy sauce, low sodium
  • 2 teaspoons toasted sesame oil
  • 1 teaspoon Sriracha hot pepper sauce
  • Salt and pepper, to taste

Directions:

Cook the riced cauliflower in the microwave for 5 minutes.  Set aside.

Heat a large skillet over medium high heat, add 1 tablespoon of the oil and quickly scramble the eggs with a pinch of salt.  Remove the eggs to a plate.

Add the remaining oil to the same pan, and saute the cabbage and carrots for about 5 minutes, until crisp-tender and starting to brown.

Add the cooked riced cauliflower to the pan and saute for a few minutes, to allow any excess moisture to evaporate.  Add the peas and green onions and cook for 1-2 more minutes. 

Add the scrambled eggs, Tamari, sesame oil and Sriracha, and stir to combine thoroughly.  Taste to adjust seasonings and serve.

Variations:  Add chopped beef, pork, chicken or shrimp.  Add different vegetables such as broccoli, spinach, or peppers.  Add some fresh ginger or garlic.

Bean Free Turkey Chili

Even though I’m cutting back on starchy grains and beans, I still enjoy a hearty bowl of chili, In fact, many people would say that beans don’t belong in chili at all. I love that you can vary the ingredients and toppings, and everyone can have it the way they like it!

There are so many variations in chili recipes. You can make it with chunks of meat rather than ground, you can soften and blend whole dried chili peppers, add beer or broth instead of tomatoes, add cinnamon or chocolate, or serve it over macaroni.

In my version, I keep it pretty simple, using the basic chili powder blend that you can find in any grocery store. Note that this already has salt added, which is why I only add a small amount of salt in addition to the chili powder.

I start by sauteing 2 pounds of ground turkey. Then I like to bulk up the vegetable content by adding minced mushrooms, diced onions and roasted red peppers. Fresh garlic and a jalapeno pepper go in next.

Then I add the dried spices, chili powder, cumin, oregano, salt and pepper, as well as 2 chipotle chilies in adobo sauce, which give it a smoky, spicy kick. I also add 2 cans of diced tomatoes and 2 small cans of tomato sauce. You can substitute broth or beer for the tomato sauce if you prefer, or add less to make a thicker chili.

One tip for using canned chipotle chilies…plop the whole contents of the can in a blender, then portion it out into tablespoon-size servings and freeze. Then whenever you need some spicy chili flavor you can take a frozen chunk and add to whatever dish you’re making.

One more tip…all chili recipes benefit from simmering for at least an hour so that all the flavors have time to develop. It even tastes better the next day, and freezes well so that you can make a big batch and have it ready anytime you have a taste for it.

Bean-Free Turkey Chili

Servings:  8

  • 2 tablespoons avocado oil (or olive oil)
  • 2 pounds ground turkey, preferably organic
  • 1 (8-ounce) package of button mushrooms, minced
  • 1 large onion, diced
  • 1 jalapeno pepper, seeded and minced
  • 3 teaspoons minced fresh garlic
  • 1 (12-ounce) jar roasted red peppers, drained and diced
  • 2 chipotle chilies in adobo sauce from a can, minced
  • 2 (14.5 ounce) cans diced tomatoes
  • 1 (16-ounce) can tomato sauce
  • 2 tablespoons chili powder
  • 2 teaspoons ground cumin
  • 1 teaspoon dried oregano
  • 1/4 teaspoon sea salt, or to taste
  • 1/4 teaspoon black pepper

Directions:

Heat a large skillet over medium high heat, add the oil and ground turkey.  Saute for a few minutes until starting to brown.  Add the mushrooms, onions, and jalapeno and continue cooking until soft, and liquid has mostly evaporated.   Add the garlic and cook for 30 seconds.    

Add all remaining ingredients, bring to a boil.  Lower the heat and simmer for 1 hour.   

Serve with toppings of your choice:  shredded cheese, pico de gallo, sour cream, guacamole, scallions, or hot sauce.

Variations:  Use a blend of meats, ground beef or pork.  Use less tomato sauce if you like it really thick, or substitute beer for the tomato sauce.  Add cayenne or more chilies if you like it spicier.

Chunky Guacamole

Avocados are very nutritious and contain a wide variety of nutrients, including 20 different vitamins and minerals, plus fiber and heart-healthy monounsaturated fatty acids.

They are great mashed and made into guacamole, or simply sliced or diced and added to salads, on top of burgers, chicken or fish. They can also be used in sweet recipes, such as chocolate mousse.

In honor of Cinco de Mayo coming up in a few days, I am including my highly praised, go-to dip for parties, and pretty much any occasion.

It can be a bit tricky choosing an avocado at the store. You don’t want them too soft, which means over-ripe and probably brown inside. If I have a few days before I need to use them, I will buy ones that are still hard, and let them ripen on my kitchen counter. You can also put them in a paper bag and they will ripen faster.

It’s very important when cutting into an avocado that you do it on a cutting board, NOT while holding it in your hand. I have seen people on TV holding one half of the avocado and jamming the blade of their knife into the pit to remove it. Instead, just use a small spoon to scoop the pit out.

So now on to the guacamole recipe. The basic recipe is very simple…just mashed avocado, salt, and acid, such as lemon or lime juice. But I like to add a bit of chopped onion, jalapeno pepper and cilantro.

It’s best to make sure everything is very finely chopped, then mix it all together. And I don’t mash the avocado too much. I think it’s better kept a bit chunky.

You can make the guacamole ahead of time, (just an hour or two), and place it in a bowl with plastic wrap touching the surface so that it doesn’t brown.

You can serve it with carrot sticks, celery, chips, or on top of Zesty Turkey Taco Salad.

Chunky Guacamole

Servings:  2-4

  • 1 large or 2 small avocados
  • 2 tablespoons minced red onion
  • 1 tablespoon fresh lemon or lime juice
  • 1 tablespoon finely chopped cilantro
  • 2 teaspoons minced jalapeno, seeds and ribs removed, optional
  • 1/4 teaspoon sea salt, or to taste

Directions:

Slice the avocados in half lengthwise and scoop out the pits with a spoon.  Discard pits and scoop the flesh into a bowl.  Mash with a fork, leaving it a bit chunky.  Add the remaining ingredients and stir to combine.  Taste to adjust seasonings.  Add more lemon juice or salt, if necessary.

Variations:  Add finely diced tomato, and/or minced garlic.

Zesty Turkey Taco Salad

I probably make some version of tacos every other week. It’s such a quick, easy and flavorful meal , whether you serve the meat in traditional corn tortillas, or over lettuce. The variety of condiments you can serve alongside is endless, making it a fun dish for parties.

Sometimes I’ll make them with shredded rotisserie chicken and green salsa, or I’ll make them fajita-style with chicken thighs, peppers and onions, or fish tacos with cabbage and cilantro-lime crema. So check back for those recipes in the future.

Today I’m sharing a basic recipe for taco meat made with ground turkey. Lately I’ve been adding minced mushrooms to the meat, to bulk it up with extra flavor and nutrition.

I started by sauteing diced onions and ground turkey in a pan. If you don’t have mushrooms or bell peppers on hand, then it’s OK to leave them out. The basic turkey and onion mixture, along with the spice blend is all you really need.

While the meat and vegetables are cooking, you can prepare your spices. The spice blend is enough for one recipe, but if you want to double or quadruple the spices, you can store it in an airtight container and have it available for several more meals.

Once you add all of the spices to the pan, continue to simmer for a few more minutes.

Then you can prepare your condiments. Here I just have some lettuce, Pico de Gallo and shredded cheese, but you can include cooked beans, guacamole, jalapenos, hot sauce, or anything you like.

My husband prefers his on flour tortillas, while I usually make a salad. However you like it, this recipe can be adapted any way you prefer. For example, use ground beef instead of ground turkey.

I hope you will try it. Why not make tonight Taco Night!

Zesty Turkey Taco Salad

Servings:  4

  • 2 tablespoons avocado oil (or olive oil)
  • 1 pound ground turkey
  • 1 (8-ounce) package of button mushrooms, minced
  • 1 medium onion, or half of a large onion, diced
  • 1 red or green bell pepper, seeded and diced
  • 2 cloves garlic, minced
  • Taco Spice Blend (see below)
  • Chopped romaine lettuce
  • Shredded cheese, cheddar, Monterey jack, or a blend
  • Pico de Gallo (see below)
  • Sour cream, optional

Taco Spice Blend

  • 2 teaspoons chili powder
  • 2 teaspoons ground cumin
  • 2 teaspoons ground coriander
  • 1 teaspoon paprika
  • 1/2 teaspoon chipotle chili powder
  • 1/4 teaspoon sea salt
  • 1/4 teaspoon black pepper
  • 1/4 teaspoon cayenne pepper (optional)

Pico de Gallo

  • 1 large tomato, finely chopped
  • 2 tablespoons onion, finely chopped
  • 1 jalapeno pepper, seeded and minced
  • 1 tablespoon finely chopped cilantro
  • 1 tablespoon fresh lemon or lime juice
  • A pinch of salt, to taste

Directions:

Heat a large skillet over medium high heat, add the oil and ground turkey.  Saute for a few minutes until starting to brown.  Add the onions and peppers and continue cooking until soft.    

Add the garlic, Taco Spice Blend and stir.  Lower the heat and simmer for 10 minutes.   

Serve over lettuce with the condiments of your choice.  Some options are:  shredded cheese, pico de gallo, sour cream, guacamole, sliced raw or pickled jalapenos, chopped scallions, cooked beans.

Variations:  Add a minced jalapeno, poblano or other pepper for more heat.  Add a couple handfuls of fresh spinach leaves at the end, cook just until wilted.

Marinara Sauce

It’s so easy to make your own sauce. Why spend more and serve your family sauce from a jar that contains unhealthy ingredients such as soybean oil, corn oil, high fructose corn syrup and excessive amounts of salt?

Sure, it takes a little over an hour to cook, but most of the time it’s just simmering on the stove. If you have a few minutes to saute some onions, you can throw everything together, and go do other things while it cooks.

Even though I’m not eating starchy foods like pasta on a regular basis, I still enjoy this sauce over grilled chicken parmesan or gluten-free meatballs, spaghetti squash or sauteed cabbage.

So the first step is to add some olive oil to your pot, heat to medium and add the finely diced onions.

Once they are nice and tender, add the garlic and cook for a bit longer. Then add the canned crushed tomatoes and the dried spices.

Just cover and let it simmer for an hour. Then toss in fresh basil and you’re ready to serve! Don’t leave out the fresh basil if at all possible. It really makes the sauce special, and adds a bright, sweet flavor. If you don’t have access to fresh basil, then add 2 teaspoons of dried basil along with all of the other spices.

This time I served the Marinara sauce over baked spaghetti squash.

Marinara Sauce

Servings:  8 cups

  • 1/4 cup olive oil
  • 1 large onion, finely diced (approx. 2 cups)
  • 2 teaspoons minced garlic
  • 2 (28-ounce) cans crushed tomatoes
  • 2 teaspoons dried oregano
  • 2 teaspoons sea salt (or to taste)
  • 1 teaspoon black pepper
  • 1/2 teaspoon granulated stevia (such as Truvia)
  • 1/2 teaspoon crushed red pepper flakes
  • 1 bunch of fresh basil leaves, finely chopped

Directions:

In a large pot, saute the onion in the olive oil over medium heat until tender, about 8 minutes.  Add the garlic and cook for another 30 seconds. 

Add the tomatoes and all other ingredients, except basil.  Bring to a boil, then lower the heat to a simmer.  Cover partially and cook for 1 hour, stirring occasionally.

Remove from the heat and stir in the fresh basil.

Variations:  Add ground beef, turkey, or Italian sausage when sautéing the vegetables.  Add mushrooms, shredded carrot or bell peppers. 

Juicy Turkey Burgers

Who doesn’t love a nice, juicy burger? Well, there’s no reason you can’t have one, even if you’re following a healthy diet.

I have been cutting back on the amount of red meat in my diet. In fact, I don’t even make it at home anymore, but will occasionally have some at a restaurant. For example, my husband and I just returned from a vacation in Texas, and we had the most amazing beef brisket in Austin.

But on a regular basis when cooking at home, I like to use ground turkey. This recipe is so simple, it only has 4 ingredients. You can whip these up after work in only 20 minutes.

My recipe calls for McCormick Montreal Steak Seasoning which I have used many times in the past, but this time I had some Chicago Style Steak Seasoning on hand, so I used that. You can even make up your own seasoning blend if you prefer.

So you just mix everything together in a bowl (I like to use my hands), then form into 4 patties.

Then I placed them in a hot grill pan on the stove. Even though it’s April, it’s still too cold here in Chicago to be grilling outdoors. After cooking 5 minutes on each side, I put the pan in the oven for 5 more minutes to be sure that they are fully cooked.

I like to serve my burgers on some sturdy lettuce leaves, or sometimes I will just eat them with a knife and fork. My husband prefers a traditional bun. A great side dish to have with burgers is my Super Simple Slaw.

Juicy Turkey Burgers

Servings:  4

  • 1 pound ground turkey, preferably organic
  • 2 teaspoons Worcestershire sauce
  • 1 teaspoon granulated McCormick Montreal Steak Seasoning
  • 1/4 cup scallions (green parts only), finely sliced

Directions:

Preheat the oven to 350 degrees.

Add all the ingredients to a large bowl and mix with your hands to combine.  Form into 4 equal patties.

Heat an oven-safe grill pan to medium.  If not a non-stick surface, add a bit of oil to the pan.  Grill the burgers for 5 minutes on each side, then place the pan into the oven to continue cooking for another 5 minutes, or until they reach an internal temperature of 165 degrees.

Serve the burgers on lettuce leaves or buns with the condiments of your choice.

Notes:  Montreal Steak Seasoning is a spice blend containing salt, paprika, black pepper, crushed red pepper flakes, granulated onion, granulated garlic, crushed coriander and dill.

You can also cook the burgers on an outdoor grill over medium-high heat with the lid closed for 5 minutes on each side.

Super Simple Slaw

I make coleslaw at least once a week. It’s super quick and easy if you buy the pre-shredded cabbage mix, or even in you buy a whole cabbage and slice it yourself. It only takes 5 minutes to throw together.

I like the basic recipe with a mayo-based dressing, but sometimes I will make one with vinegar and oil, kind of a sweet and sour version.

I start by chopping some scallions. Then I just mix the mayonnaise, vinegar, salt and stevia in a large bowl, and add the bag of coleslaw and onions.

That’s all there is to it! Some people say that it’s best to chill the salad for an hour for the flavors to blend, but I often serve it immediately and it’s just fine.

This goes great with burgers, sandwiches, crab cakes, fish, pretty much anything. Enjoy!

Super Simple Slaw

Servings:  4 (1 cup each)

  • 1/4 cup mayonnaise
  • 2 tablespoons apple cider vinegar
  • 1 teaspoon granulated stevia (such as Truvia)
  • 1/2 teaspoon sea salt
  • 2 scallions (green parts only), finely sliced
  • 1 (14-ounce) bag coleslaw mix, (or a half head of raw cabbage, finely sliced)

Directions:

Add the first 4 ingredients to a large bowl and stir with a whisk to combine thoroughly.  Add the onions and coleslaw and toss.  Refrigerate until ready to serve.

Variations:  Use extra virgin olive oil or avocado oil instead of mayonnaise.